Support our educational content for free when you buy through links on our site. Learn more

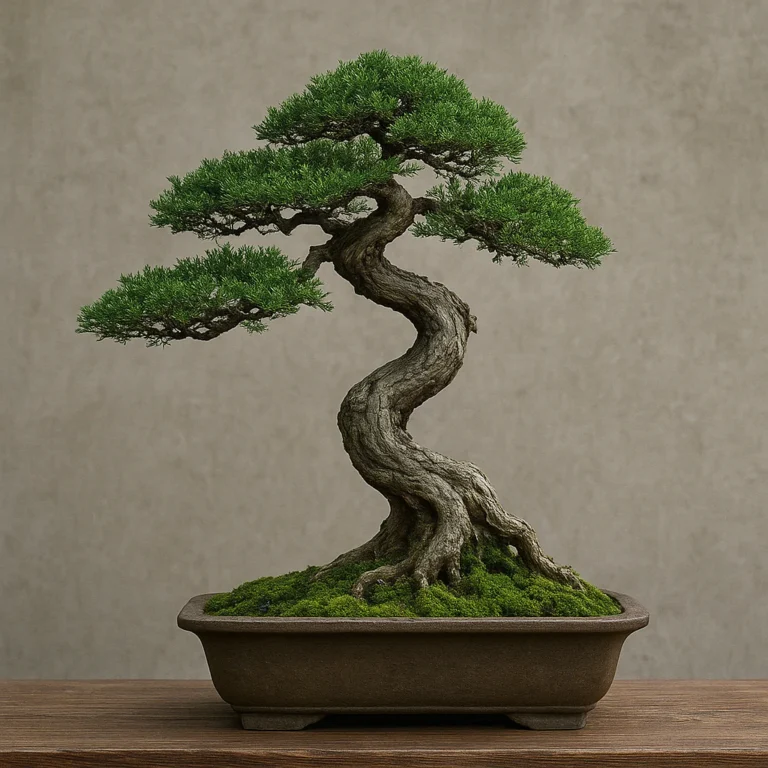
Have you ever stood on a windswept cliff edge, watching a lone pine tree bow and twist under the relentless assault of a gale, and wondered how it survives? That raw, dramatic struggle is exactly what we capture when we create a Windswept bonsai style (or Fukinagashi). Unlike the perfectly symetrical Formal Upright, this style tells a story of resilience, where every branch and twig flows in unison with an invisible, powerful force. At Bonsai Garden™, we’ve spent years mastering this dynamic art form, and we’re here to show you how to transform a humble nursery tree into a living sculpture that defies gravity and time.
In this comprehensive guide, we’ll take you from the history of this survival-inspired aesthetic to the nitty-gritty of wiring techniques that won’t snap your branches. We’ll reveal the top 7 species best suited for this dramatic look, share a step-by-step roadmap for creating your own masterpiece, and even dissect a real-life 7-year transformation of a Juniper that went from “just leaning” to a true windswept icon. Whether you’re a beginner wondering if you can convert a regular tree or an advanced artist looking to refine your deadwood techniques, this article has the answers you’ve been searching for. Ready to harness the storm in your living room? Let’s dive in.
Key Takeaways
- True Windswept is More Than a Lean: It requires all branches and foliage to flow in one direction, creating a dynamic illusion of constant wind, not just a slanted trunk.
- Species Selection is Critical: Junipers, Pines, and Spruces are the top choices due to their flexible branches and ability to develop dramatic deadwood features.
- Patience is the Ultimate Tool: Creating a convincing windswept bonsai is a long-term journey involving years of wiring, pruning, and repoting to achieve natural ramification.
- Deadwood Adds Authenticity: Techniques like Jin and Shari are essential for mimicking the weathered, battered look of a tree surviving harsh elements.
- Health Comes First: Never sacrifice the tree’s vitality for aesthetics; a healthy tree is the only canvas that can sustain the stress of this demanding style.
Table of Contents
- ⚡️ Quick Tips and Facts
- 🌪️ The Windswept Bonsai Style: A History of Survival and Art
- 🌲 Decoding the Windswept Form: Key Characteristics and Identification
- 🏆 Top 7 Species Perfect for Creating a Windswept Masterpiece
- 🛠️ Step-by-Step Guide: How to Create a Windswept Bonsai from Scratch
- ✂️ Wiring Techniques for the Windswept Style: Bending Without Breaking
- 🌱 Soil, Water, and Light: The Unique Care Requirements for Windswept Trees
- ❌ Common Mistakes to Avoid When Styling Windswept Bonsai
- 🎨 Advanced Styling: Refining the Illusion of a Relentless Gale
- 🧐 Windswept vs. Semi-Cascade vs. Literati: Understanding the Differences
- 📸 More About This Pin: Showcasing Stunning Windswept Examples
- 🔍 Related Interests: Exploring Other Dynamic Bonsai Styles
- 🏁 Conclusion: Embracing the Storm in Your Living Room
- 🔗 Recommended Links
- 📚 Reference Links
⚡️ Quick Tips and Facts
Welcome, fellow tree whisperers, to Bonsai Garden™! We’re thrilled you’re diving
into the captivating world of windswept bonsai. This isn’t just a style; it’s a story of resilience, a testament to nature’s power, and a breathtaking piece of living art. Imagine a lone tree clinging to a mountain ridge
, constantly battered by relentless gales – that’s the spirit we aim to capture. Ready to harness the wind? Let’s get started with some quick insights!
- Fukinagashi (Windswept)
Style: This Japanese term literally translates to “wind-blown” and perfectly encapsulates the aesthetic. It’s about depicting a tree that has been shaped by continuous strong winds. - One-S
ided Growth: The most striking characteristic is that both the trunk and branches grow predominantly to one side, creating a dramatic sense of movement and struggle. - Not Just a Lean: Don’t
mistake it for simply leaning a tree! A true windswept bonsai tells a story of wind direction and intensity, affecting every part of the tree, from the smallest twig to the main trunk.
Species Versatility: While junipers are a popular choice, many species can be trained in the windswept style, offering a wide range of creative possibilities.
- Patience is Key: Like all bonsai, creating a windswe
pt masterpiece is a journey, not a sprint. It involves years of careful wiring, pruning, and repotting. - Dynamic Illusion: The goal is to create a “moving illusion” where the tree appears to be reacting to
the wind at that very moment.
Want to learn more about starting your bonsai journey? Check out our Bonsai for Beginners section!
🌪️ The Windswept Bons
ai Style: A History of Survival and Art
Have you ever stood on a windswept coast or a high mountain pass and seen trees bent into incredible, almost sculptural forms? That, dear friends, is the raw inspiration behind the Windswe
pt bonsai style, or Fukinagashi. At Bonsai Garden™, we believe this style isn’t just about aesthetics; it’s a profound narrative of survival against the odds, a living sculpture that tells a tale of nature
‘s relentless power and the indomitable spirit of life.
The roots of the windswept style, like many traditional bonsai forms, are deeply embedded in observing nature. Ancient Japanese and Chinese artists, captivated by trees that defied harsh
conditions, sought to replicate this struggle in miniature. Imagine a tree on a cliff, its branches stripped bare on one side, its trunk permanently bowed by an unseen force. This imagery became the blueprint for Fukinagashi.
The core concept
of the Windswept style is to represent trees that must struggle to survive against constant, dominant wind forces. It’s a powerful visual metaphor for resilience. Unlike a perfectly symmetrical formal upright, the winds
wept tree embraces asymmetry, telling a story of adaptation. It’s often categorized alongside other “struggle” styles, such as the Literati (Bunjingi), which conveys elegance through adversity, or Growing in a rock
(Ishisuki), which highlights survival in seemingly impossible conditions. These styles all emphasize the profound beauty found in nature’s tenacity.
We’ve personally found that working on a windswept design connects
us deeply to the wild. There’s something incredibly satisfying about coaxing a branch to flow with an invisible current, knowing you’re mimicking centuries of natural artistry. It’s a dance between human intention and natural inspiration, a conversation
with the elements themselves.
🌲 Decoding the Windswept Form: Key Characteristics and Identification
So,
you’ve seen a windswept bonsai, and something about its dramatic flair caught your eye. But what exactly makes a windswept, well, windswept? It’s more than just a leaning trunk, a
common misconception we often encounter. As Robert Steven, a master of windswept styles, points out, “Many people misunderstand that windswept style bonsai is simply formed by leaning the trunk and placing all the branches one side. It is not that simple
.” He’s absolutely right!
The essence of Fukinagashi lies in creating a logical depiction of specific wind conditions: a gentle breeze, a strong continuous wind, or even wind that is currently
blowing. This means every element of the tree must contribute to this illusion.
Let’s break down the key characteristics:
Trunk and Branch Direction: The Unifying Flow
- Unidirectional Growth: Both
the trunk and branches grow predominantly to one side, as if constantly pushed by the wind. While branches might initially emerge on all sides, they are eventually trained to face the prevailing wind direction. - Dynamic
Movement: The trunk itself often shows a strong curve or angle, suggesting the force of the wind has permanently shaped its growth. It’s not just a lean; it’s a sweeping motion. - Branch B
ending: Side branches should show dramatic bending in the wind’s direction. Even the main branches, while relatively straighter, contribute to the overall directional flow.
Foliage Management: Less is More for
the Illusion
- Sparse Foliage: For a truly convincing windswept effect, the leaves must be “very spare” to enhance the illusion of movement and flowing lines. Think about a
tree in a gale – it’s not a lush, full canopy, but rather a streamlined form. - Twig Tips Upward: All tiny twig tips must flow slightly upward in one direction, reinforcing the sense of wind pushing
them. This subtle detail is crucial for realism.
Roots and Potting: Anchoring the Storm
- Strong Rootage: Often, the roots on the side facing the “wind” will be
more exposed and appear stronger, as if gripping the earth against the elements. - Potting Angle: The tree is typically potted slightly off-center, leaning away from the direction the wind is perceived to be coming from.
Here’
s a quick table to help you identify the key traits:
| Characteristic | Description | ✅ / ❌ for Windswept |
|---|---|---|
| :— | :— | :— |
| Trunk Direction | Clearly leans or curves in one predominant direction, away from the perceived wind source. | ✅ |
| Branch Placement | All branches, | |
| from primary to tertiary, extend primarily to one side, flowing with the wind. | ✅ | |
| Foliage Density | Sparse, open foliage pads to emphasize branch lines and movement. | ✅ |
| Twig Tips | All fine twigs point slightly upwards and in the direction of the wind. | ✅ |
| Root Exposure | Often shows strong, exposed roots on the windward side, anchoring
the tree. | ✅ |
| Symmetry | Highly asymmetrical, reflecting natural forces. | ✅ |
| Leaning Only | A tree simply leaning without all branches and
foliage reflecting wind direction. | ❌ |
| Full, Dense Canopy| A lush, thick canopy that obscures branch lines and movement. | ❌ |
It’s a very advanced style, requiring
mastery of basic design principles and a deep conceptual understanding. But don’t let that deter you! The reward is a living sculpture that truly tells a story.
🏆 Top 7 Species Perfect for Creating a Windswept Masterpiece
Choosing the right tree species is paramount when embarking on a windswept bonsai journey
. You need a tree that’s not only resilient but also has flexible branches, interesting bark, and foliage that can be refined to convey the illusion of wind. Based on our collective experience at Bonsai Garden™ and insights from seasoned enthusiasts
, here are our top 7 species that truly excel in the Fukinagashi style:
- Juniper (Juniperus species) 🌲:
- Why we love them: Junipers are arguably
the most popular choice for windswept bonsai, and for good reason! Their naturally twisting trunks, ability to create dramatic deadwood (jin and shari), and dense, fine foliage make them ideal. They are incredibly hardy and respond
well to wiring. We’ve seen countless stunning transformations, like the one documented on Pinterest, where a Juniper pre-bonsai evolved from an Informal to a breathtaking Windswept style over several years.
Our Tip: Varieties like Shimpaku Juniper or Prostrate Juniper (like the ‘Green Carpet’ mentioned in the featured video, which naturally started to take on a windswept look) are
excellent starting points.
- Pine (Pinus species) 🌳:
- Why we love them: Pines, especially Japanese Black Pine (Pinus thunbergii) and **Japanese White Pine
** (Pinus parviflora), are iconic for their rugged, ancient appearance. Their stiff needles and strong trunks perfectly convey a struggle against harsh elements. They develop fantastic bark texture over time. - Our Tip: Be mindful
of candle pruning to manage needle length and density, which is crucial for the windswept aesthetic.
- Spruce (Picea species) 🎄:
- Why we love them: Spruces offer a
dense, compact needle structure that can be meticulously shaped. Their downward-sweeping branches lend themselves well to the windswept form, especially when depicting a tree on an exposed ridge. - Our Tip: Norway Spruce (Picea abies) or Colorado Blue Spruce (Picea pungens) are robust options.
- Larch (Larix species) 🍂:
-
Why we love them: Larches are deciduous
conifers, offering a unique seasonal interest. Their fine branching structure and delicate needles in spring, followed by golden autumn colors, provide a beautiful contrast to the harshness of the windswept style. They are incredibly flexible when young. -
Our Tip: European Larch (Larix decidua) is a fantastic choice, known for its rapid growth and responsiveness to training.
- Oak (Quercus species) 🌰:
Why we love them: For a broadleaf option, Oaks bring a sense of strength and longevity. While slower to develop fine ramification, their powerful trunks and rugged bark can create a very convincing windswept look, especially for
larger specimens.
- Our Tip: Focus on developing strong primary and secondary branches before refining the canopy.
- Cotoneaster (Cotoneaster horizontalis) 🍒:
- Why we
love them: If you’re looking for something with smaller leaves and often berries, Cotoneaster is a delightful option. Its naturally horizontal growth habit can be easily adapted to a windswept design, and its small leaves scale well for
bonsai. - Our Tip: Excellent for smaller windswept compositions, adding color with its berries.
- Pyracantha (Pyracantha coccinea) 🔥:
- Why we
love them: Similar to Cotoneaster, Pyracantha offers small leaves and vibrant berries, along with thorns that add character. Its woody stems are flexible when young, making it amenable to wiring. - Our Tip: Be
cautious of the thorns during styling!
Remember, the best species for you is often the one you connect with most and can source locally. For more general advice on selecting your first tree, explore our Bonsai for Beginners section!
🛠️ Step-by-Step Guide: How to Create a Windswept Bonsai from Scratch
Ready to sculpt your own living masterpiece? Creating a windswept bonsai is a rewarding journey that blends
horticultural skill with artistic vision. It requires patience, observation, and a willingness to embrace asymmetry. Here at Bonsai Garden™, we’ve guided countless enthusiasts through this process, and we’re here to share our tried-and-true
method.
1. Selecting Your Material: The Foundation of Your Vision
- Source Your Tree: Start with healthy nursery stock, a pre-bonsai, or even collected material. Look for a tree with a strong trunk,
good nebari (root flare), and some existing branches that can be manipulated. Junipers, pines, and spruces are excellent choices, as we discussed! - Assess Potential: Envision the wind’s direction.
Which side of the tree naturally lends itself to being the “windward” side (where branches are sparse or absent) and the “leeward” side (where branches are pushed)? - Consider the Front: As seen in the featured video
, even experienced artists like Tony take time to decide on the front of the tree. He spent half an hour contemplating the best angle for his Juniper, ultimately deciding to keep his options open for future refinement. Don
‘t rush this crucial step!
2. Initial Pruning and Cleaning: Revealing the Canvas
- Remove Unwanted Branches: Carefully prune away any branches that are growing directly into the perceived wind, or those that are
too thick and detract from the overall flow. - Clean the Trunk: Remove any small, insignificant twigs or dead foliage from the main trunk to highlight its form.
- Health First: Always prioritize the health of your tree
. As Tony wisely advises in the video, “my priority is still to get this tree, keep this tree healthy.” Don’t remove too much material at once, especially if your tree isn’t robust.
3. Wiring the Trunk and Primary Branches: Setting the Direction
- Choose Your Wire: Use anodized aluminum wire (for deciduous trees) or annealed copper wire (for conifers) of appropriate thickness. The wire should be strong
enough to hold the branch in place but not so thick that it damages the bark. (More on this in the next section!) - Anchor the Wire: Securely anchor your wire to the pot, the base of the trunk
, or a thicker branch. - Apply Wire: Wrap the wire around the trunk and primary branches at a 45-degree angle, ensuring it’s snug but not cutting into the bark. Apply in the direction you
want the branch to bend. - Bend with Care: Gently bend the trunk and primary branches to create the desired windswept curve. Remember, the entire tree should convey movement in one direction. In the video, Tony demonstrates
how he gets the trunk moving, then brings the branches around to flow with it.
4. Shaping Secondary and Tertiary Branches: Crafting the Illusion
- Directional Flow: Wire and
position all secondary and tertiary branches to flow in the same direction as the main trunk. This is where the illusion of wind truly comes alive. - Pad Creation: Start to define foliage pads, ensuring they are sparse and streamlined, not
dense and bushy. Tony meticulously works on creating distinct pads at different levels, ensuring they all flow in the same direction. - “Clip-and-Grow” Method: This technique is highly recommended for developing the
necessary ramification (fine branching structure) in windswept styles. Instead of relying solely on wiring, you prune branches back to encourage new growth in the desired direction, then allow them to grow, and repeat
the process. This builds density and natural movement over time.
5. Jinning and Shari: Adding Age and Drama
-
Deadwood for Realism: Jin (stripped branches) and Shari (stripped trunk sections) are fantastic for enhancing the windswept aesthetic, mimicking the damage caused by harsh winds over time. The Juniper transformation on Pinterest shows jinning applied to the longest branch to enhance the windswept look.
-
Technique: Carefully strip bark from branches or sections of the trunk, then treat the exposed wood with lime sulfur to preserve and whiten it. This creates a stark contrast that emphasizes the struggle.
6. Repotting
and Root Management: Anchoring Your Creation
- Timing: Repot during the appropriate season for your chosen species, typically early spring.
- Root Pruning: Prune roots to encourage a strong, radial nebari,
especially on the windward side, to suggest stability against the elements. - Potting Angle: When repotting, position the tree slightly off-center in the pot, leaning it subtly away from the perceived wind direction. The
Pinterest Juniper was repotted multiple times over seven years to refine its windswept style.
7. Ongoing Maintenance and Refinement: The Never-Ending Journey
- Regular Pruning: Continu
ously prune to maintain the windswept shape, encourage ramification, and keep foliage sparse. - Wire Removal and Reapplication: Remove wire before it bites into the bark. Reapply as needed to refine branch placement and maintain the desired
angles. Tony mentions he’ll be removing and reapplying wire to his Juniper to track its progress. - Observation: Step back frequently and observe your tree from all angles. Does it convey the illusion of wind
? Does it tell a compelling story?
Creating a windswept bonsai is a journey of continuous learning and artistic expression. Don’t be afraid to experiment, and remember, the most beautiful trees are often those that show their struggle.
For more general care advice, visit our Bonsai Care Basics section!
✂️ Wiring Techniques for the Windswept Style: Bending Without Breaking
Ah, wiring! The sculptor’s tool in the bonsai world. For the windswept
style, wiring isn’t just about shaping; it’s about directing the very essence of the tree, making it flow with an invisible force. It’s a delicate dance between persuasion and force, and mastering it is crucial
for creating that convincing windswept illusion.
We’ve all been there – staring at a branch, wondering if it will bend or snap. Trust us, with the right technique and a bit of courage, you can achieve incredible transformations
.
Choosing Your Weapon: Wire Types and Gauges
The type and thickness of wire you choose are critical.
- Anodized Aluminum Wire:
- Pros: Easier to apply, less likely to
damage bark, reusable (to some extent), and generally preferred for deciduous trees and beginners. It’s also more forgiving if you make a mistake. - Cons: Not as strong as copper, can be less aesthetically pleasing if
left on for extended periods. - Annealed Copper Wire:
- Pros: Extremely strong, holds its shape exceptionally well, and develops a beautiful patina over time, blending with the bark. Ideal for conifers and more
advanced work. - Cons: Harder to apply, can easily damage bark if not careful, and more expensive.
Wire Gauge Guide:
| Branch Thickness | Aluminum Wire Gauge (mm) | Copper Wire Gauge (mm) |
|---|---|---|
| Very Fine Twigs | 1.0 – 1.5 | 0.8 – 1.0 |
| Small | ||
| Branches | 2.0 – 2.5 | 1.2 – 1.5 |
| Medium Branches | 3.0 – 4.0 | 2.0 – |
| 2.5 | ||
| Thick Branches | 5.0 – 6.0 | 3.0 – 4.0 |
| Trunk | 6.0+ (or multiple wires) | |
| 4.0+ (or multiple wires) |
Pro Tip: Always choose a wire that is about 1/3 to 1/2 the thickness of the branch you are wiring. If one wire isn’t
strong enough, use two wires applied parallel to each other.
👉 Shop Bonsai Wire on:
- Bonsai Aesthetics Aluminum Wire: Amazon | Etsy
- The Bonsai Supply Copper Wire: Amazon | The Bonsai Supply Official Website
The Art of Application: Guiding the Wind
- Anchor Securely: This is paramount! Your wire needs a solid anchor point. For trunks, start by anchoring into the soil or around the base of the trunk. For branches,
anchor around a thicker part of the trunk or a stronger branch. - 45-Degree Angle is Your Friend: Wrap the wire around the branch or trunk at a consistent 45-degree angle. This provides the best
grip and allows for even bending. Avoid crossing wires or creating loose loops. - Snug, Not Tight: The wire should be snug against the bark, but not so tight that it cuts in. Leave a tiny bit of breathing
room for growth. - Bend Gradually: Once wired, gently bend the branch into the desired position. For windswept, this means directing all branches to flow in the same general direction. Remember Tony’s process in the video:
he wires, then then starts to bend and position, ensuring the trunk moves, and then the branches follow suit. - Create Levels and Flow: As Tony demonstrates, you’ll want
to create distinct “pads” of foliage at different levels, all sweeping in the same direction. He meticulously works to get a lower pad, a higher pad, and even a back pad, all contributing to the windswept illusion. - Refine the Twigs: Don’t forget the smallest details! Even the fine twig tips need to be wired and positioned to point slightly upwards and in the direction of the wind. This is where the illusion truly becomes convincing.
When to Remove and Reapply: The Ongoing Conversation
- Check Regularly: Inspect your wired branches every few weeks. As the tree grows, the wire can start to bite into the
bark, causing unsightly scars. - Remove Before Scarring: When you see the wire starting to embed itself, it’s time to remove it. Use wire cutters designed for bonsai to prevent damaging the bark.
Reapply as Needed: The branch may not hold its new position permanently after the first wiring. Reapply wire if the branch springs back, or if you want to refine the shape further. This is a continuous process over years, as the
Pinterest Juniper transformation clearly shows.
Wiring is a skill that improves with practice. Don’t be discouraged if your first attempts aren’t perfect. Each wire you apply is a step closer to creating a breathtaking
windswept bonsai that tells its own unique story of resilience. For more detailed insights into general bonsai care, including wiring, check out our Bonsai Care Basics section!
🌱 Soil, Water, and Light: The Unique
Care Requirements for Windswept Trees
Just as a windswept tree in nature adapts to its harsh environment, your windswept bonsai needs specific care to thrive and maintain its dramatic form. It’s not just about styling; it’s
about providing the right foundation for survival. At Bonsai Garden™, we’ve learned that understanding these fundamental needs is just as crucial as mastering the artistic techniques.
The Foundation: Soil Mix for Stability and Drainage
A windswept bonsai often
has a dynamic, exposed root system, especially on the “windward” side. This means your soil mix needs to be top-notch for both anchorage and health.
- Excellent Drainage is Non-Negotiable: Windswept trees
, particularly conifers often used for this style, despise soggy feet. A well-draining soil mix prevents root rot and encourages strong, healthy roots. - Good Aeration: Roots need oxygen! A granular soil mix allows air to circulate,
which is vital for root respiration. - Nutrient Retention: While draining well, the soil still needs to hold enough nutrients to sustain growth.
Our Recommended Soil Mix (for most conifers and hardy deciduous):
*
Akadama (50-60%): A hard-baked clay granule that provides excellent water retention and drainage. It’s stable and breaks down slowly.
- Pumice (20-30%): A volcanic rock that improves drainage and aeration, and also helps retain some moisture.
- Lava Rock (10-20%): Adds weight for stability, improves drainage, and provides trace minerals.
Optional: Horticultural Charcoal (small amount): Helps keep the soil fresh and absorbs impurities.
Why this mix? It mimics the lean, well-drained, and often rocky soils found in the exposed environments where windswe
pt trees naturally occur. For more on soil, visit our Bonsai Care Basics section.
The Lifeline: Watering for
Resilience
Watering a windswept bonsai is an art in itself. The exposed nature of some roots and the often shallower pots mean they can dry out faster.
- Check Daily (Especially in Summer): Don’t water
on a schedule; water when the tree needs it. Stick your finger about an inch into the soil. If it feels dry, it’s time to water. - Thorough Soaking: When you do water, do
it thoroughly until water drains freely from the bottom of the pot. We often recommend the “two-pour” method: water once, let it soak in for a few minutes, then water again. - Consider Humidity: In
dry climates or during hot spells, misting the foliage (especially for junipers and pines) can help maintain humidity, but it’s not a substitute for proper root watering. - Avoid Overwatering: While thorough watering is good, constant
soggy conditions are a death sentence. Ensure your pot has adequate drainage holes.
The Energy Source: Light for Vigor and Form
Windswept trees in nature are typically found in exposed, sunny locations. Your bonsai should be
no different!
- Full Sun is Best: Most species suitable for windswept style (especially conifers like junipers and pines) thrive in at least 6-8 hours of direct sunlight per day. This promotes compact
growth, strong ramification, and vibrant foliage color. - Orientation Matters: Consider the direction of your “wind.” While the tree is styled to look windswept, it still needs even light exposure to all its green parts
. Rotate your tree periodically to ensure all sides receive adequate light, or position it where the “leeward” side (with more foliage) gets ample sun. - Protection from Extreme Heat: In very hot climates, some afternoon
shade might be beneficial during the peak of summer to prevent scorching, especially for younger or newly styled trees.
By paying close attention to these fundamental care requirements, you’ll ensure your windswept bonsai not only looks magnificent but also remains
healthy and vigorous for years to come. After all, a struggling tree (in terms of health) won’t be able to convey the strength of a windswept survivor!
❌ Common Mistakes to Avoid When Styling Windswept Bonsai
We’ve all made them – those little (or sometimes not-so-little) missteps that teach
us valuable lessons. When it comes to the windswept style, there are a few common pitfalls that can turn your dramatic vision into something less convincing. At Bonsai Garden™, we believe in learning from experience, both ours and others’. So
, let’s explore what not to do, ensuring your windswept creation truly tells its powerful story.
1. Mistaking a Lean for a Gale 🌬️
- The Error: This is perhaps
the most common misconception. Many beginners think a windswept bonsai is simply a tree with a leaning trunk and all branches on one side. - Why it’s wrong: A true windswept style
depicts a continuous, directional force. It’s not just about the trunk’s angle, but how every part of the tree – from the smallest twig to the overall foliage mass – responds to that invisible wind. - The
Fix: Think holistically. Ensure all branches, even those on the “windward” side (which should be sparse or absent), contribute to the directional flow. The entire composition should feel dynamic, as if caught in a moment of perpetual
motion.
2. Lack of Proper Ramification 🌳
- The Error: Insufficient fine branching (ramification) makes a tree look immature and lacks the depth needed for a convincing windswept effect.
- Why it’s wrong: Without dense, intricate twigging, the illusion of movement and age is lost. The tree appears stiff and unnatural.
- The Fix: Employ techniques like **
“clip-and-grow”** and consistent pruning to encourage dense secondary and tertiary branching. This builds the visual weight and complexity that makes the windswept style so compelling.
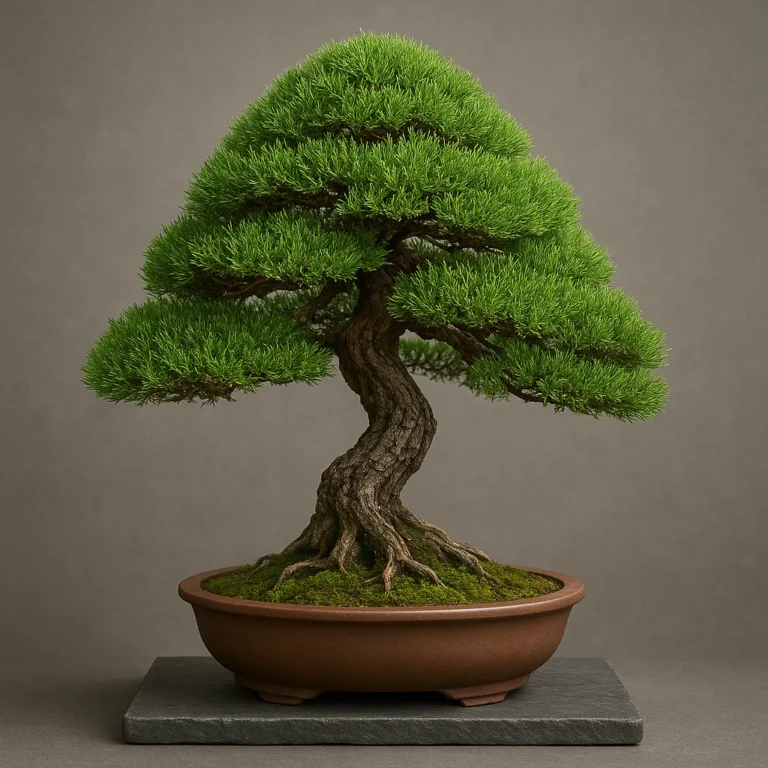
3. Overly Dense or Static Foliage 🍃
- The Error: A full, lush canopy, or foliage that appears “still” and not moving with the wind.
- Why it’s wrong: The windswept style demands sparse
foliage to emphasize the lines of the branches and the sense of movement. If the foliage is too dense, it hides the underlying structure and makes the tree look heavy, not wind-blown. - The Fix: **Reduce foliage significantly
**. Prune to create open, streamlined pads that suggest the wind has stripped away excess. Ensure all twig tips point in the direction of the wind.
4. Including Irrelevant Elements 🌾
- The Error: Adding elements to the composition that detract from the windswept theme, such as lush grasses around the base that appear “still.”
- Why it’s wrong: Every
element in a bonsai composition should serve a purpose and enhance the overall artistic statement. If something contradicts the windswept illusion, it weakens the entire design. - The Fix: Keep the base of your windswept bonsai clean
and minimalist, or use elements that also suggest movement or a harsh environment (e.g., exposed rock).
5. Neglecting Tree Health for Aesthetics 💚
- The Error: Aggressive pruning, wiring, or styling
that compromises the tree’s health. - Why it’s wrong: As Tony from the featured video wisely advises, “my priority is still to get this tree, keep this tree healthy.” A
sick tree won’t respond well to training and certainly won’t thrive. - The Fix: Always prioritize the tree’s well-being. Don’t remove too much foliage at once, especially on a struggling tree. Space
out your major styling sessions and ensure proper watering, feeding, and light. A healthy tree is a beautiful tree, regardless of style.
6. Rushing the Process ⏳
- The Error: Expecting immediate
results or trying to force a shape too quickly. - Why it’s wrong: Bonsai is a long-term art form. The windswept style, with its dramatic curves and refined ramification, takes years,
even decades, to develop. The Juniper transformation on Pinterest spanned over seven years, with multiple repottings and styling sessions. - The Fix: Embrace patience. Work incrementally, allowing the tree to recover between
styling sessions. Enjoy the journey of gradual transformation.
By being mindful of these common mistakes, you’ll be well on your way to creating a windswept bonsai that truly captures the raw beauty and resilience of nature. For more general
troubleshooting, check out our Bonsai FAQs!
🎨 Advanced Styling: Refining the Illusion of a Relentless Gale
Once you’ve mastered the basics of creating a windswept bonsai, the real artistry begins: refining the illusion.
This is where your tree transcends a mere horticultural specimen and becomes a profound statement, a snapshot of nature’s power frozen in time. At Bonsai Garden™, we find immense satisfaction in these subtle yet impactful techniques that elevate a good windswept bonsai
to a truly exceptional one.
The goal, as Robert Steven emphasizes, is to create a “moving illusion” where the tree appears to be reacting to the wind at that specific moment. It’s not just
about shaping; it’s about storytelling.
1. The Art of Deadwood: Jin and Shari for Dramatic Effect
- Jin (Dead Branches): Imagine a tree on a exposed cliff face. The wind doesn
‘t just bend branches; it breaks them, strips them bare, and leaves them as stark, bleached remnants. Jinning is the process of creating these artistic dead branches. - Technique: Carefully strip the bark from a
branch, leaving the bare wood. Use jin pliers to twist and shape it, mimicking natural breakage. Treat with lime sulfur to preserve and whiten the wood, creating a stark contrast with the living parts of the tree. The Pinterest Juniper example
shows jinning applied to its longest branch to enhance the windswept aesthetic. - Shari (Dead Trunk Sections): This involves stripping bark from sections of the main trunk, exposing the underlying
wood. Shari adds immense age and character, suggesting centuries of exposure to harsh elements. - Technique: Carefully carve away sections of bark, following the natural lines of the trunk. Again, treat with lime sulfur.
The placement of shari should enhance the flow of the wind, often appearing on the windward side where the tree has been most battered.
2. Refining the Foliage: The Breath of the Wind
- Sparse
and Streamlined: We’ve mentioned it before, but it bears repeating: foliage must be “very spare” to enhance the movement of the lines. Think of a flag flapping in the
wind – it’s thin and aerodynamic. - Directional Pads: Ensure your foliage pads are not only flowing in the direction of the wind but also have a slightly upward tilt at the tips. This subtle detail gives the impression of uplift
from the wind. - Negative Space: Don’t be afraid of empty spaces! These negative spaces are crucial for emphasizing the movement of the branches and allowing the “wind” to flow through the tree. They are just as important as the
foliage itself.
3. Trunk Movement and Nebari: Anchoring the Storm
- Exaggerated Curves: For advanced windswept designs, consider more dramatic curves in the trunk, especially if your species allows for
it. These curves should always follow the direction of the wind. - Strong Nebari: A powerful, gripping nebari (root flare) at the base of the trunk reinforces the idea of a tree firmly anchored against powerful forces. Ex
pose some of the stronger roots on the windward side to enhance this effect.
4. Pot Selection and Placement: The Stage for Your Drama
- Unglazed, Earthy Tones: Often, unglazed pots
in natural, earthy tones complement the ruggedness of a windswept style. - Low Profile: A shallower, wider pot can enhance the sense of the tree clinging to a sparse landscape.
- Asymmetrical Placement: The
tree is usually placed off-center, leaning into the larger space within the pot, further emphasizing its directional growth.
5. The “Moving Illusion”: Bringing it All Together
- Visual Balance: Despite the asymmetry, the
overall composition must feel balanced. The weight of the foliage and the direction of the trunk should create a harmonious, dynamic flow. - Storytelling: Every element, from the deadwood to the smallest twig, should contribute to the narrative
of a tree shaped by relentless wind. Step back and ask yourself: Does this tree feel like it’s battling a gale? Does it evoke emotion?
This level of refinement takes years of practice and a keen eye for detail
. But the journey itself is incredibly rewarding, allowing you to create a living sculpture that truly embodies the power and beauty of nature. For more inspiration, explore our Bonsai Inspiration and Ideas section!
🧐 Windswept
vs. Semi-Cascade vs. Literati: Understanding the Differences
The world of bonsai styles is rich and diverse, often with subtle nuances that differentiate one from another. It’s easy to confuse styles that share some visual similarities, especially those
that convey a sense of struggle or dynamic movement. Here at Bonsai Garden™, we often get questions about the distinctions between Windswept (Fukinagashi), Semi-Cascade (Han-Kengai), and Literati (Bunjingi). Let’s clear up the confusion and highlight what makes each style uniquely captivating.
Windswept (Fukinagashi) 🌬️
- Core Concept: Represents a tree that has been constantly battered by strong, unidirectional
winds. It’s a depiction of resilience and adaptation to a harsh, exposed environment. - Key Visuals:
- Trunk and Branches: Both the trunk and all branches
grow predominantly to one side, flowing with the perceived wind direction. - Foliage: Sparse and streamlined, emphasizing the lines of the branches and the sense of movement. All fine twigs point in the
direction of the wind. - Overall Impression: Dynamic, struggling, and often dramatic. The tree appears to be actively resisting or being shaped by the wind.
- Analogy: A
flag caught in a permanent gale.
Semi-Cascade (Han-Kengai) 🌊
- Core Concept: Mimics a tree growing on a cliff face or riverbank, where the trunk extends horizontally and then drops below
the rim of the pot, but not below the base of the pot. It suggests a tree reaching out over an obstacle. - Key Visuals:
- Trunk: The main trunk typically emerges from the pot
, travels horizontally for a distance, and then gently curves downwards. - Apex: The apex (top) of the tree usually remains above the rim of the pot.
- Branches: Branches often emerge from the upper
side of the horizontal trunk, with some cascading downwards. - Overall Impression: Elegant, graceful, and often serene. It conveys a sense of reaching or flowing downwards without the extreme drama of a full cascade.
Analogy: A waterfall gently flowing over a ledge.
Literati (Bunjingi) 📜
- Core Concept: Inspired by classical Chinese ink wash paintings, this style emphasizes elegance, minimalism, and the tree
‘s inner spirit rather than its struggle against elements. It often depicts a tree that has grown tall and slender in a dense forest, reaching for light. - Key Visuals:
Trunk: Tall, slender, and often dramatically curved or contorted, with minimal branching in the lower sections. The trunk line is the star.
- Branches: Very few branches, typically concentrated towards the top of
the tree, creating a sparse, airy canopy. - Foliage: Minimalist and often delicate, emphasizing the elegant lines of the trunk and branches.
- Overall Impression: Poetic, refined, and ethereal.
It conveys a sense of age, wisdom, and understated beauty. - Analogy: A calligraphic brushstroke, or a lone scholar contemplating nature.
Here’s a comparison table to help solidify the differences:
| Feature
| Windswept (Fukinagashi) | Semi-Cascade (Han-Kengai) | Literati (Bunjingi) |
|---|---|---|
| :— | :— | :— |
| Primary Theme | Struggle against constant wind forces. | Reaching over an obstacle, flowing downwards. |
| Trunk Direction | Predominantly to one side, flowing with the wind. | Extends horizontally, then drops below pot rim (not base). |
| , slender, often dramatically curved, minimal lower branches. | ||
| Branch Placement | All branches flow to one side. | Some branches cascade, apex above pot rim. |
| at the top. | ||
| Foliage Density | Sparse, streamlined. | Moderate. |
| Potting Angle | Often | |
| leans away from perceived wind. | Often angled to enhance cascade. | Can be upright or slightly leaning, often in small, round pots. |
| Overall Feeling | Dynamic, powerful, resilient. | Graceful, flowing |
| , contemplative. | Poetic, ancient, refined. |
While the Slanting (Shakan) style also involves a leaning trunk, it differs from Windswept because its focus is on a specific 60-80 degree angle
with roots developed on one side for balance, rather than the directional bending of the entire canopy and trunk structure due to wind.
Understanding these distinctions will not only deepen your appreciation for each style but also guide you
in creating truly authentic and impactful bonsai art. For more on various styles, check out our Bonsai Inspiration and Ideas
section.
📸 More About This Pin: Showcasing Stunning Windswept Examples
We’ve talked
a lot about the theory and techniques, but sometimes, seeing is believing! There’s a fantastic example on Pinterest that perfectly illustrates the journey of a windswept bonsai, a testament to patience and vision. This particular “Pin” showcases a
personal journey of transforming a Juniper pre-bonsai from an Informal style to a captivating Windswept masterpiece.
The owner started with their first Juniper pre-bonsai on February 1, 201
6, and diligently enrolled in classes to learn the art. Over the years, this tree underwent significant transformations. Initially, it was maintained in a Semi-Formal style through repotting, pruning, and wiring in 2017
and 2018.
But then came the complete re-design in September 2019, a pivotal moment where the tree was decisively shifted from its Informal style to the Windswept aesthetic
. This wasn’t a one-and-done deal; the tree was subsequently repotted in the Windswept style in January 2020, 2021, and 2
023, showing the continuous refinement required.
One of the most striking techniques applied was jinning on the longest branch in May 2026. This creation
of deadwood dramatically enhanced the windswept aesthetic, mimicking the natural damage and weathering a tree would endure in a truly exposed environment. The series of images (Picture 1 through Picture 9) on the Pinterest board beautifully documents this gradual shift, illustrating
how the canopy direction and trunk movement slowly but surely aligned with the windswept vision.
What this example truly highlights is:
- The Power of Evolution: Bonsai is never truly “finished.” It
‘s an ongoing process of growth, refinement, and adaptation. - Patience and Persistence: A dramatic transformation like this takes years of dedicated effort.
- Learning and Application: The owner’s journey from taking
classes to applying advanced techniques like jinning demonstrates the continuous learning curve in bonsai.
This Juniper serves as a wonderful inspiration, proving that with time, dedication, and the right techniques, you can guide a humble nursery tree into a breathtaking work
of living art that tells a compelling story of survival. It’s a journey we at Bonsai Garden™ encourage all our enthusiasts to embark upon!
🔍 Related Interests: Exploring Other Dynamic Bonsai Styles
If the dramatic flair and narrative power of the windswept style have captivated your imagination, you’re likely drawn to bonsai that tell a story of resilience
, movement, or unique natural conditions. Beyond Fukinagashi, the world of bonsai offers a plethora of dynamic styles that can challenge and inspire you. At Bonsai Garden™, we love to explore these variations, each offering a different window
into nature’s artistry.
Here are a few related styles and interests that often appeal to windswept enthusiasts:
-
Cascade (Kengai) and Semi-Cascade (Han-Kengai): If you enjoy
the downward flow and dramatic lines of a windswept, you’ll love cascades. Full cascade styles feature a trunk that drops well below the bottom of the pot, mimicking trees clinging to steep cliffs. Semi-cascades, as we discussed,
drop below the rim but not the base. Both offer incredible opportunities for dynamic compositions. -
Literati (Bunjingi): While visually distinct, Literati shares the windswept’s emphasis on conveying a tree’s spirit
and struggle, albeit through elegance and minimalism rather than overt force. It’s about the beauty of a tree that has overcome adversity to reach for the light. -
Slanting (Shakan): This style features a trunk that leans
significantly to one side, often at a 60-80 degree angle. While not as dramatically shaped by wind as Fukinagashi, it shares the sense of directional growth and often implies exposure to elements. -
Root-Over-Rock (Sekijoju) and Rock-Clinging (Ishisuki): These styles literally integrate the tree with a rock, showcasing its struggle to survive by gripping onto stone. If you appreciate the windswept
‘s narrative of survival against harsh conditions, these styles take that concept to a literal extreme, creating powerful, sculptural statements. -
Driftwood and Deadwood Techniques (Jin and Shari): The use of deadwood is
paramount in windswept bonsai to convey age and struggle. If you enjoy creating these dramatic features, exploring them further in other styles or as standalone artistic elements can be very rewarding. -
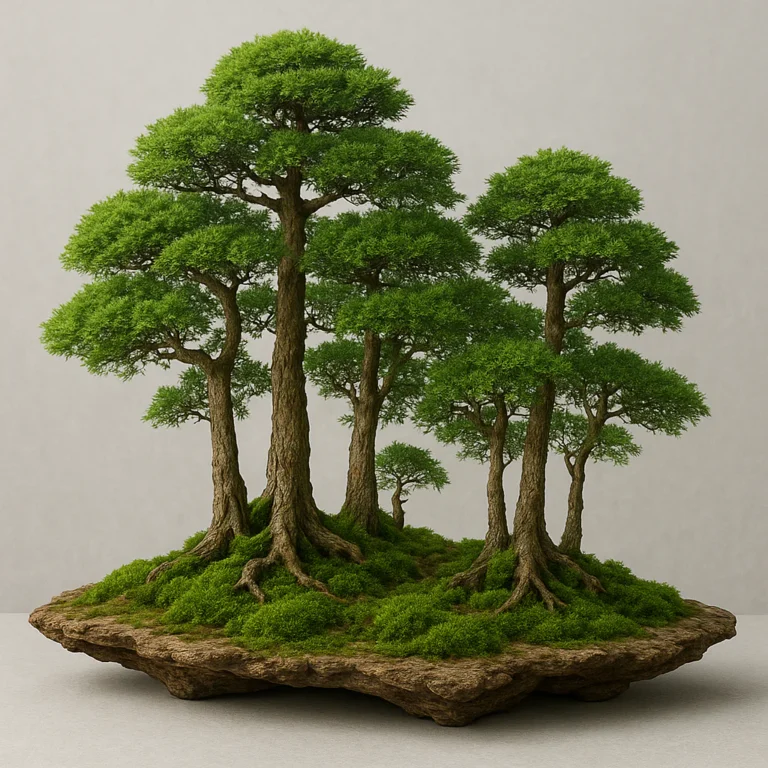
Group Plantings (Yose-ue): While not a single tree style, group plantings can create a powerful sense of an exposed forest edge or a cluster of trees battling the elements together. You can even incorporate windswept elements into individual trees within a group.
Exploring
these related interests can broaden your artistic palette and deepen your understanding of how different natural forces and conditions can be translated into bonsai art. Each style presents its own unique challenges and rewards, pushing your skills and creativity. Dive into our Bonsai Inspiration and Ideas section for more exciting avenues to explore!