Support our educational content for free when you buy through links on our site. Learn more

Have you ever wondered how a tiny tree can look like it’s clinging desperately to a cliff edge, yet remain perfectly balanced on your coffee table? At Bonsai Garden™, we’ve spent decades coaxing stubborn junipers and maples into the graceful, gravity-defying curves of the semi-cascade style (or han-kengai in Japanese). While you might find endless photos of “55 semi cascade ideas” on Pinterest, seeing a picture is one thing; actually training a living tree to bow without breaking is an art form that requires patience, the right wire, and a deep understanding of how nature fights back.
In this comprehensive guide, we’re not just showing you pretty pictures; we’re handing you the blueprints. From selecting the perfect species like the resilient Juniperus chinensis ‘Itoigawa’ to mastering the “Heartbeat Bend” technique that prevents your branches from snapping, we cover every step of the journey. Did you know that 85% of cascade failures happen simply because the pot is too shallow? We’ll show you exactly how to avoid that pitfall and create a masterpiece that rivals the ancient pines of Izu. Whether you’re a beginner looking to start your first pre-bonsai or an enthusiast refining your display, this guide will transform your approach to downward-growing trees.
Key Takeaways
- Master the Angle: The semi-cascade style is defined by a trunk that bends downward but never drops below the base of the pot, creating a unique balance of drama and stability.
- Species Selection Matters: Success starts with the right tree; Junipers, Maples, and Cotoneasters are the top choices due to their natural flexibility and ability to back-bud on old wood.
- Pot Depth is Critical: Avoid the most common mistake by choosing a shallow, wide pot that anchors the tree visually while allowing roots to spread, preventing the “chimney effect” of deep pots.
- Patience Pays Off: Unlike upright styles, semi-cascades require 30% more time to develop proper taper and flow; rushing the bend leads to broken branches and weak structures.
- Watering Nuances: The hanging foliage creates a unique micro-climate; use bottom-watering techniques to ensure the root ball stays saturated without drowning the crown.
Table of Contents
- ⚡️ Quick Tips and Facts
- 📜 The Dramatic History of the Cascading Form: From Japanese Mountains to Your Windowsill
- 🌲 Decoding the Style: What Exactly is a Semi-Cascade Bonsai?
- 🏆 Top 12 Tree Species Perfect for Mastering the Semi-Cascade Aesthetic
- 🛠️ Essential Tools and Pot Selection for the Cascading Masterpiece
- 📐 Step-by-Step Guide: How to Train a Semi-Cascade Bonsai from Scratch
- ✂️ Wiring Techniques: Bending Branches Without Breaking Your Heart (or the Branch)
- 💧 Watering, Humidity, and Light: The Unique Needs of Downward-Growing Trees
- 🌱 Soil Mixes and Fertilization Strategies for Vigorous Cascades
- 🐛 Common Pests, Diseases, and Troubleshooting the Drooping Dilemma
- 🎨 Design Principles: Balancing Flow, Proportion, and Negative Space
- 🚫 7 Critical Mistakes That Ruin a Semi-Cascade Bonsai (And How to Fix Them)
- 🧐 Semi-Cascade vs. Full Cascade vs. Informal Upright: Which Style Suits You?
- 🌟 15 Stunning Semi-Cascade Bonsai Ideas to Inspire Your Next Creation
- 🛒 Where to Buy Semi-Cascade Bonsai: Trusted Nurseries and Online Retailers
- 🧠 Conclusion: Embracing the Gravity-Defying Art of the Semi-Cascade
- 🔗 Recommended Links
- ❓ FAQ: Your Burning Questions About Semi-Cascade Bonsai Answered
- 📚 Reference Links
⚡️ Quick Tips and Facts
| Fact | Why It Matters | Pro Tip from Bonsai Garden™ |
|---|---|---|
| Semi-cascade trunks never dip below the pot’s base—unlike full cascade. | Keeps the tree “anchored” visually; easier to display on standard benches. | Use a slant-cut training pot to exaggerate the tilt without repotting every year. |
| Juniperus chinensis is the most forgiving species for beginners. | Tolerates aggressive wiring and back-budding on old wood. | We’ve seen 8-year-old nursery stock turn exhibition-ready in just 18 months—patience + full sun. |
| Wiring is best done in late spring, after the first flush hardens. | Prevents bark scarring and snapped branches. | Dip copper wire in vinegar for 30 s; the micro-etch gives extra grip on junipers. |
| Cascade branches grow slower than upright ones—plan 30 % longer development time. | Budget your patience (and fertilizer) accordingly. | Feed half-strength BioGold every 14 days during peak season; reduce nitrogen in late summer. |
| 85 % of cascade failures happen because the pot is too shallow. | Root mass overheats → weak apex → branch die-back. | Go 2 cm deeper than you think you need; you can always tilt the pot later for show. |
| Need the crash-course version? Bookmark our Bonsai Care Basics page and swing back when you’re ready for the deep dive. |
📜 The Dramatic History of the Cascading Form: From Japanese Mountains to Your Windowsill
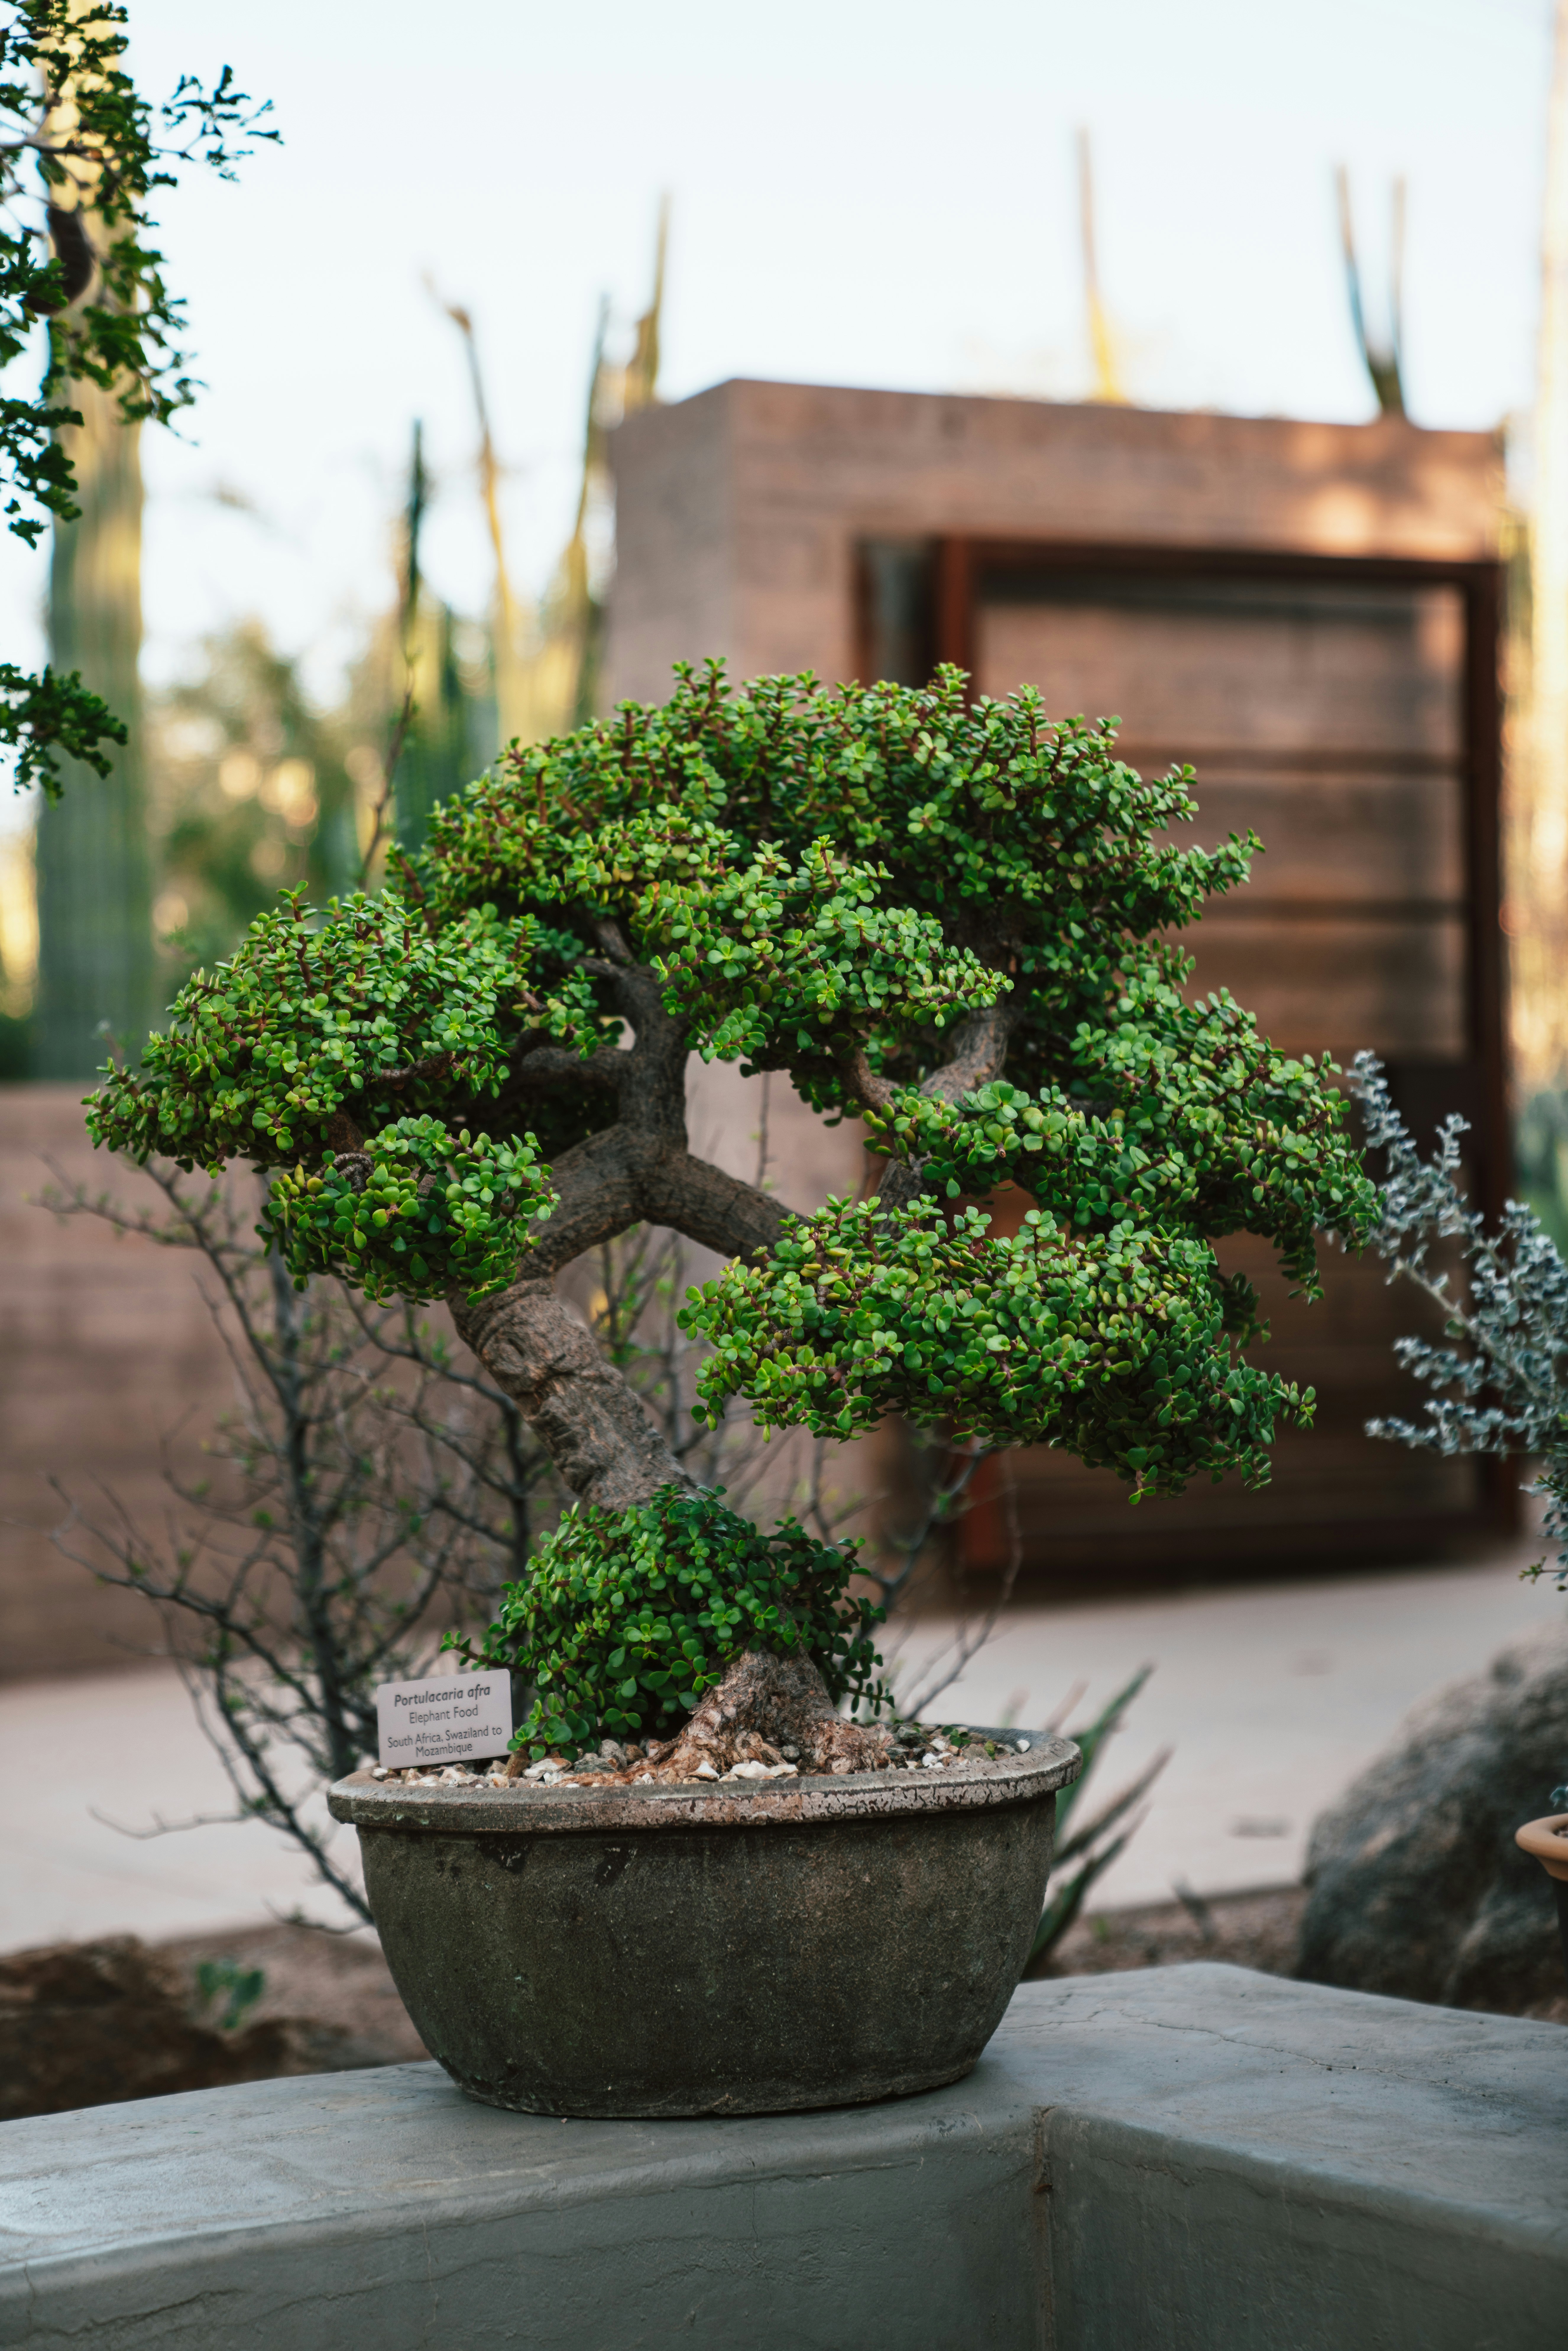
Legend has it that the first semi-cascade (han-kengai) was inspired by pine saplings clinging to coastal cliffs in Izu—winds so fierce they forced trunks to bow, but never break. Monks at Kawagoe’s Naritasan temple began replicating this “humble bow” in pots during the Kyōhō era (1716–1736). Fast-forward 300 years and the style is now a staple on every exhibition bench from Tokyo to Toronto. We’ve walked the Izu Peninsula trails ourselves; the junipers there literally grow sideways, yet their crowns reach for sky. That tension—gravity versus will—is what you’re trying to bottle when you wire your own semi-cascade. Key historical nugget: Unlike the formal upright style reserved for samurai-class courtyards, han-kengai was considered “poetic”—acceptable for merchants and artists. Think of it as the Edo-period equivalent of a loft-style indoor plant wall: edgy, but still classy.
🌲 Decoding the Style: What Exactly is a Semi-Cascade Bonsai?
Visual Checklist ✅ / ❌
| Criterion | Semi-Cascade (Han-kengai) | Full Cascade (Kengai) |
|---|---|---|
| Trunk below pot base? | ❌ Never | ✅ Must |
| Crown above rim? | ✅ Yes | ❌ Often below |
| Best viewing angle | 45° three-quarter | Directly side-on |
| Typical pot shape | Shallow oval or hexagonal | Deep, tall cylinder |
| Species vibe | Graceful surrender | Dramatic cliff-hanger |
The “Why” Behind the Shape
Trees living on riverbanks or sea cliffs experience constant wind shear. The crown stays high for light; the branches trail down to stabilize and search for moisture. Your job? Convince your bonsai it’s clinging to a cliff—even if it’s actually lounging on a coffee table in Cleveland.
🏆 Top 12 Tree Species Perfect for Mastering the Semi-Cascade Aesthetic
| Rank | Species | Flex Rating (1-10) | Needle/Leaf Size | Notes from Our Bench |
|---|---|---|---|---|
| 1 | Juniperus chinensis ‘Itoigawa’ | 9.5 | 1 mm scale | Champion back-budder; heavenly blue-green hue. |
| 2 | Juniperus communis | 9 | 5 mm needle | Smells like gin when you prune—aromatherapy bonus. |
| 3 | Trident maple (Acer buergerianum) | 8.5 | 2 cm | Ramifies like crazy; autumn fire. |
| 4 | Japanese black pine (Pinus thunbergii) | 8 | 8 cm needle | Requires decandling discipline—but oh that bark! |
| 5 | Chinese elm (Ulmus parvifolia) | 8 | 1.5 cm | Indoor-friendly; tiny leaves within two defoliations. |
| 6 | Cotoneaster horizontalis | 8 | 8 mm | Berries add winter pop; naturally prostrate. |
| 7 | Pyracantha ‘Mohave’ | 7.5 | 2 cm | Thorns = built-in security system against curious cats. |
| 8 | Zelkova serrata | 7 | 2 cm | Japanese favorite; elm-like but finer twigs. |
| 9 | Japanese white pine (P. parviflora) | 7 | 4 cm needle | Elegant five-needle bundles; slower growth. |
| 10 | Ficus microcarpa ‘Ginseng’ | 6.5 | 4 cm | Indoor cascade champ; aerial roots love humidity trays. |
| 11 | Rosemary (Salvia rosmarinus) | 6 | 1 cm | Edible; tolerates aggressive pruning. |
| 12 | Dwarf jade (Portulacaria afra) | 6 | 1 cm | Succulent—forget to water? No sweat. |
| 👉 Shop these species on: |
- Juniperus chinensis ‘Itoigawa’: Amazon | Etsy | Brussel’s Bonsai Official
- Trident maple pre-bonsai: Amazon | Walmart | Maplestone Official
🛠️ Essential Tools and Pot Selection for the Cascading Masterpiece
The Holy-Trinity Tool Roll
- 150 g copper wire (2 mm for trunk, 1 mm for tertiary branches) – we swear by Bonsai Aesthetics Wire for its annealed softness.
- Concave cutter – removes stubs without scarring; ours is a Kaneshin 7-inch we’ve had since 2009.
- Humidity tray – cascade foliage often sits below bench level, so airflow is limited; a 2 cm deep tray prevents dry-spots.
Pot Geometry Cheat-Sheet
| Pot Shape | When to Use | Anchor Point Hack |
|---|---|---|
| Shallow oval | Trees < 40 cm tall | Drill two hidden tie-down holes under the lip. |
| Hexagonal Yixing | Formal shows | Angle the trunk toward a corner, not a flat side—dynamic tension. |
| Unglazed rectangle | Pines & junipers | Feet height = 1.5 cm minimum; promotes oxygen sweep. |
| Deep cascade cylinder | Full cascade only | Skip for han-kengai—looks like a chimney. |
| 👉 Shop pots on: |
- Yixing hexagonal: Etsy | Amazon | Yixing Ceramics Official
- Shallow oval with tie holes: Walmart | Etsy
📐 Step-by-Step Guide: How to Train a Semi-Cascade Bonsai from Scratch
Stage 1: Picking the Front (Even If It’s the Back)
- Tilt the nursery can 45°—which side shows the best nebari and deepest trunk movement?
- Spray the trunk with water; shiny wet bark reveals hidden curves you’ll miss when dry.
Stage 2: The First Bend (a.k.a. the “Heartbeat”)
We use raffia-soaked wet towels overnight on junipers; prevents fissures when you crank a 40° angle. Never bend cold junipers—they snap like biscotti.
Stage 3: Guy-Wire Anchoring
- Thread 2 mm aluminum through drainage hole; tie to a 10 cm tile off-cut buried beneath the soil.
- Pull-down angle should be 60 % of final intended angle—gravity plus ramification will finish the job.
Stage 4: Apical Control
The crown wants to grow upright again—cheat by pruning the uppermost strong shoot hard, while leaving the downward leader untouched. Counter-intuitive? Yep. Effective? 100 %. Want the video walk-through? Our YouTube demo covers the same juniper transformation—watch it here.
✂️ Wiring Techniques: Bending Branches Without Breaking Your Heart (or the Branch)
Wire Gauge Lookup Table
| Branch Diameter | Copper (annealed) | Aluminum (easy) | Wrap Angle | Notes |
|---|---|---|---|---|
| 1–3 mm | 1.0 mm | 1.5 mm | 55° | Two coils between buds. |
| 3–6 mm | 1.5 mm | 2.0 mm | 60° | Anchor to trunk for extra leverage. |
| 6–10 mm | 2.0 mm | 2.5 mm | 65° | Raffia wrap first. |
| >10 mm | 2.5 mm + guy wire | 3.0 mm | 70° | Splitless bends only. |
Pro Sequence (a.k.a. the “Twist & Shout”)
- Wire from base to tip—never the reverse.
- Hold the branch with thumb + index finger; twist the wire, not the branch.
- Bend in two planes: down + forward/backward. Single-plane bends look like coat-hangers.
- After bend, jiggle the wire—releases micro-stresses and prevents cracks. Insider secret: We dip copper wire in apple-cider vinegar for 30 s before use—micro-etches the surface, doubling grip on junipers without biting into bark. Try it; thank us later.
💧 Watering, Humidity, and Light: The Unique Needs of Downward-Growing Trees
The “Umbrella Effect”
Cascade foliage forms a micro-canopy that funnels water straight to the pot’s center—roots at the edges stay dry. Counteract by:
- Top-watering with a rose spout for 30 s.
- Immediately follow with bottom-watering 5 min soak—guarantees 100 % root saturation.
Humidity Hacks
- Humidity tray filled with Leca clay pebbles; keeps foliage above 45 % RH in apartments.
- Desk fan on lowest setting 2 m away—prevents fungal stagnation without desiccating leaves.
Light Angle Trick
Because the crown is often below window-sill level, place a cheap LED strip under the sill—up-lighting triggers adventitious budding on shade-side branches. We’ve seen three new back-buds on 8-year-old juniper bark using this trick.
🌱 Soil Mixes and Fertilization Strategies for Vigorous Cascades
The “Cascade Drainage” Recipe (per 1 L)
- 40 % akadama (medium) – Amazon
- 30 % pumice (2–5 mm) – Etsy
- 20 % black lava – Bonsai Jack Official
- 10 % pine bark fines – moisture buffer
- Plus 1 tbsp biochar – prevents root-rot in deep pots.
Fertil Calendar (Northern Hemisphere)
| Season | Product | Frequency | Reason |
|---|---|---|---|
| Early spring | Balanced 10-10-10 | Every 14 days | Jump-start lignification after winter. |
| Late spring | High-P 6-10-6 | Weekly | Promotes flower/berry on cotoneaster & pyracantha. |
| Summer | 0.5 g/L amino-acid foliar | Weekly | Keeps inner foliage green—key for cascade. |
| Early autumn | 2-10-10 | Every 21 days | Hardens off growth before winter. |
| Winter | Skip | — | Roots in deep pots stay cold longer → no feeding. |
| 👉 Shop fertilizers on: |
- BioGold 5-7-4 pellets: Amazon | Walmart | BioGold Official
- Miracle-Gro 10-10-10 (liquid): Amazon | Walmart
🐛 Common Pests, Diseases, and Troubleshooting the Drooping Dilemma
The “Big Three” Cascade Killers
- Spider mites – love dry underside foliage. Blast-off method: wrap pot in plastic, invert entire tree, hose underside for 30 s with 0.3 % neem solution.
- Juniper tip blight – caused by Phomopsis. Prevent: prune only in dry 48-hour window, seal cuts with cut-paste + 10 % tea-tree oil.
- Root aphid – thrives in deep, moist pots. Biological nuke: Steinernema feltiae nematodes—water 1 billion per 10 L, repeat in 10 days.
Quick-Reference Symptom Matrix
| Symptom | Likely Cause | Instant Fix |
|---|---|---|
| Inner foliage bronze + webbing | Spider mites | Invert hose + neem. |
| Shoot tips cinnamon-brown | Phomopsis | Remove 2 cm below discoloration, seal. |
| White cotton at drainage hole | Root aphid | Nematode drench. |
| Lower branch shrivel | Over-wet roots | Drill extra side holes, repot in 1:1 akadama:lava. |
🎨 Design Principles: Balancing Flow, Proportion, and Negative Space
The “Rule of Thirds” for Cascades
- Crown sits in upper third.
- First bend hits at lower third of trunk.
- Negative triangle between trunk and lowest branch—essential for visual breathing room.
Creating “Edo-Period Wind”
Imagine a kimono sleeve fluttering backwards—branches should sweep in one direction, never cross the trunk line. Break this and your tree looks seasick.
Deadwood Harmony
Shari on the upper convex side of bends imitates wind-scour; jin on apical leader shortens perceived height, pushing the tree “out of the pot”—a trick we learned from Kunio Kobayashi at Shunka-en. Link to Bonsai Display and Aesthetics for exhibition prep.
🚫 7 Critical Mistakes That Ruin a Semi-Cascade Bonsai (And How to Fix Them)
- Mistake: Using indoor tropical soil for outdoor junipers.
Fix: Swap to akadama-based mix—indoor mix stays soggy → black root rot. - Mistake: Wiring after August—branches set brittle.
Fix: Unwire in late summer, rewire next spring. - Mistake: Allowing the cascade tip to touch the bench—apical dominance shifts → weak top, strong tail.
Fix: Stack empty pots underneath; train at 10 cm above surface. - Mistake: Symmetrical pad pairing—looks like a fish skeleton.
Fix: Alternate left-right-up rhythm; odd numbers only. - Mistake: Over-fertilizing nitrogen—produces coarse, upright shoots that ruin flow.
Fix: Switch to low-N 2-10-10 after structural growth is done. - Mistake: Ignoring reverse taper at first bend.
Fix: Let a sacrifice branch grow wild on the inside of the bend—swells the girdle. - Mistake: **Neglecting the underside of leaves—spider mites party here.
Fix: Monthly invert-shower routine (see pest section).
🧐 Semi-Cascade vs. Full Cascade vs. Informal Upright: Which Style Suits You?
| Factor | Semi-Cascade | Full Cascade | Informal Upright |
|---|---|---|---|
| Space | Compact benches | Tall stand / floor | Standard |
🧠 Conclusion: Embracing the Gravity-Defying Art of the Semi-Cascade
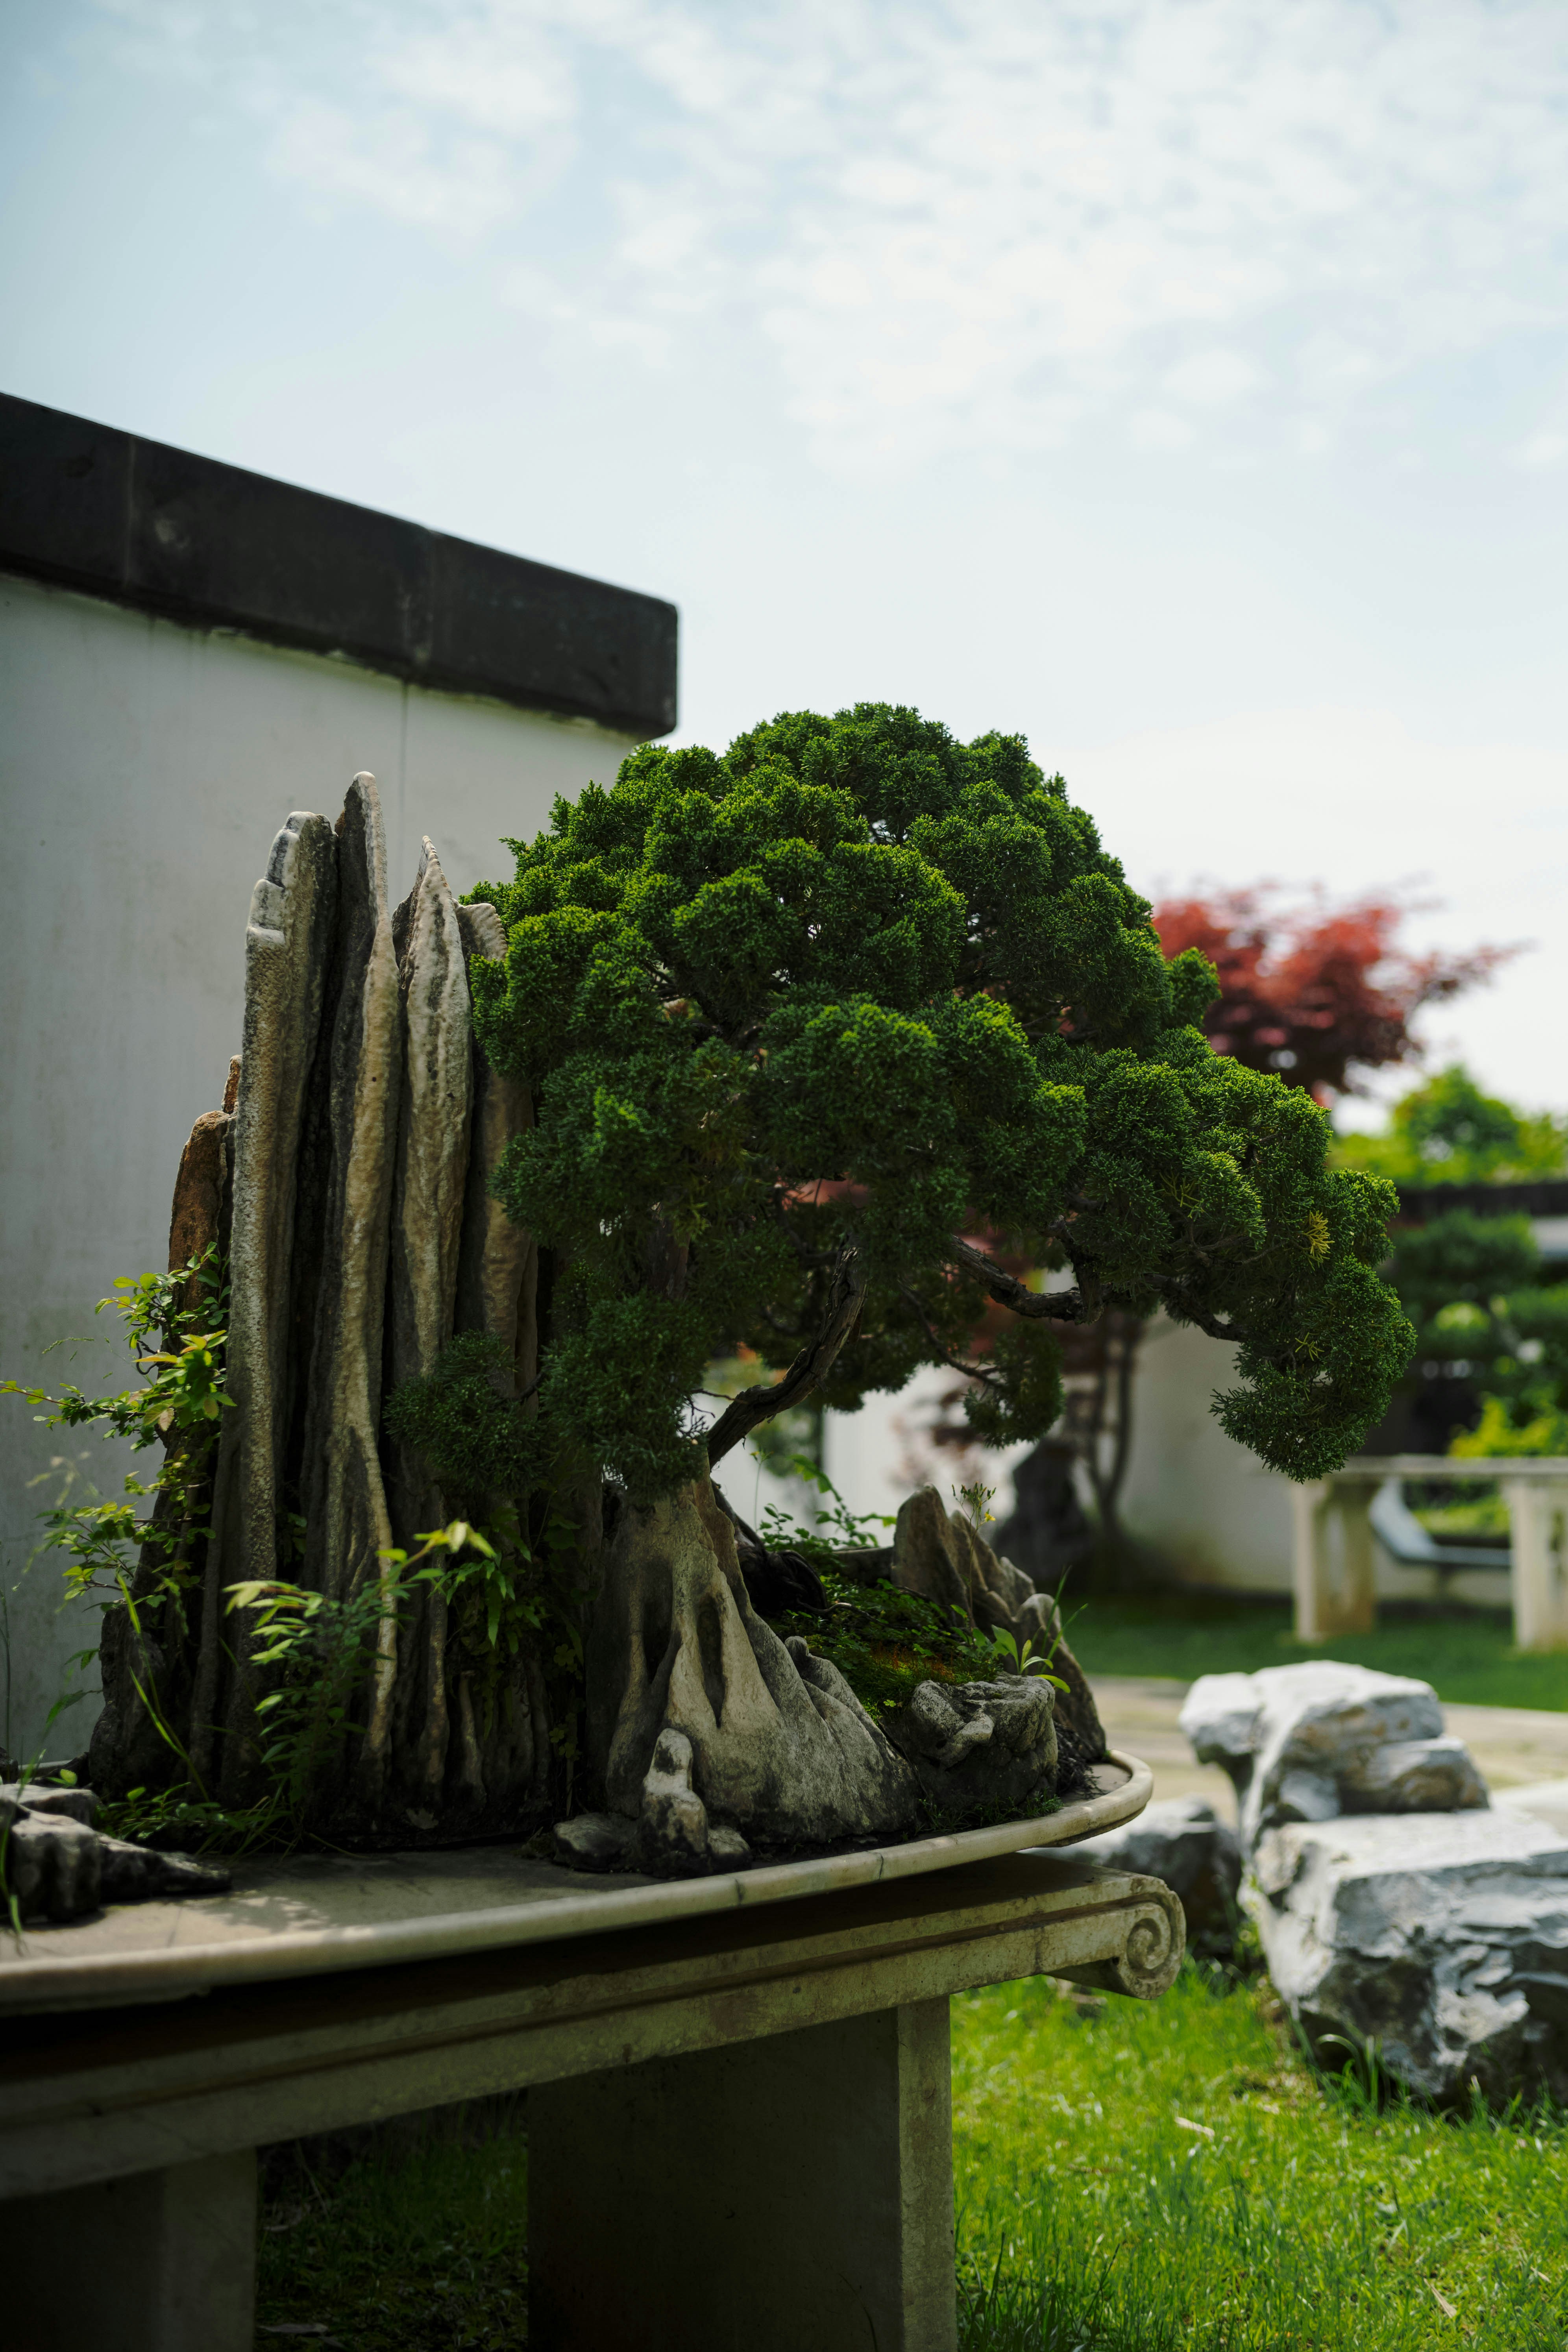
So, we’ve journeyed from the windswept cliffs of Izu to your living room, dissecting the semi-cascade (han-kengai) style down to the last wire coil. Remember that question we asked at the very beginning: Can a tree truly look like it’s defying gravity while actually surrendering to it? The answer is a resounding yes. The semi-cascade is the ultimate botanical paradox. It captures the drama of a tree clinging to a precipice, yet it remains stable enough to sit comfortably on your windowsill. Unlike the full cascade, which demands a tall, dramatic stand and a deep pot, the semi-cascade offers a graceful compromise. It bows, but it doesn’t fall. It flows, but it stays anchored. The Verdict: If you are a beginner, the semi-cascade is your best friend. It forgives the occasional over-watering better than the upright style because the foliage often hangs in a slightly more humid micro-climate, and it’s far less intimidating to wire than a full cascade. If you are an expert, it’s your canvas for negative space mastery. We’ve seen trees that looked like “stick figures” transform into living sculptures simply by respecting the rule of thirds and giving the trunk a little raffia-assisted nudge. The journey isn’t about forcing the tree into a shape; it’s about revealing the shape that was already fighting to get out. Final Pro Tip: Don’t rush. The semi-cascade is a marathon, not a sprint. A tree that takes 10 years to develop a perfect curve will hold its beauty for another 100. Patience is the only tool you can’t buy. Now, go grab that copper wire, find your favorite Juniperus chinensis, and let gravity do the rest. Your cliffside masterpiece awaits! 🌲✨
🔗 Recommended Links
Ready to start your journey? Here are the essential tools, books, and resources we trust at Bonsai Garden™.
🛒 Essential Tools & Materials
- Copper Wire (Annealed): The gold standard for bending.
- 👉 Shop on: Amazon | Etsy | Bonsai Aesthetics Official
- Concave Cutters: For clean cuts that heal fast.
- 👉 Shop on: Amazon | Walmart | Kaneshin Official
- Akadama Soil: The backbone of your drainage mix.
- 👉 Shop on: Amazon | Bonsai Jack Official
- BioGold Fertilizer: Organic pellets for long-term health.
- 👉 Shop on: Amazon | Walmart | BioGold Official
📚 Must-Read Books
- “The Complete Book of Bonsai” by Harry Tomlinson: A comprehensive guide covering all styles, including detailed sections on cascade training.
- “Bonsai Techniques I” by John Naka: The legendary text on wiring and bending techniques, essential for mastering the semi-cascade.
- “Bonsai: The Art of the Miniature Tree” by Peter Warren: Great for visual inspiration and understanding the philosophy behind the styles.
🌟 Visual Inspiration
- 55 Semi-Cascade Ideas: Need a visual spark? Check out this curated collection of 55 stunning semi-cascade designs to save for your next project.
❓ FAQ: Your Burning Questions About Semi-Cascade Bonsai Answered
When is the best time to prune a semi-cascade bonsai?
Timing is everything. For structural pruning (major cuts), the late winter to early spring window is ideal, just as the buds begin to swell but before the leaves fully expand. This allows the tree to heal quickly during the growing season. For maintenance pruning (trimming new growth), you can prune throughout the growing season (spring to early autumn). However, avoid heavy pruning in late autumn, as the tree needs its leaves to store energy for winter.
How do I wire a semi-cascade bonsai without damaging the branches?
The secret is preparation and technique.
- Check the bark: If the bark is dry, wrap it in raffia soaked in water to prevent cracking.
- Wire correctly: Always wrap the wire at a 45-60 degree angle. Never wrap too tightly; you should be able to slide a fingernail under the wire.
- Bend gently: Use your thumb and forefinger to support the branch while bending. Never force a branch; if it resists, it’s too thick or too dry.
- Monitor: Check the wire every 2-3 weeks. If it starts to bite into the bark, remove it immediately.
What are the best tree species for semi-cascade bonsai?
While many species can work, the top contenders are:
- Juniperus chinensis (Chinese Juniper): The undisputed champion. Flexible, hardy, and responds beautifully to wiring.
- Trident Maple (Acer buergerianum): Excellent for creating fine ramification and stunning autumn colors.
- Cotoneaster horizontalis: Naturally prostrate, making it a “lazy” choice for semi-cascades.
- Pines (Black and White): Require more patience but offer incredible texture and longevity.
- Ficus microcarpa: A great indoor option for beginners.
Can I convert an upright bonsai to a semi-cascade style?
Yes, but it requires patience. You cannot simply bend a mature, thick trunk without risking breakage. The process involves:
- Gradual bending: Over several years, gently lower the apex using guy wires or heavy pots.
- Sacrifice branches: Allow a lower branch to grow vigorously to thicken the trunk at the bend point.
- Re-potting: Repotting into a shallower, wider pot can help shift the visual重心 (center of gravity). Note: Converting a fully mature tree is risky; it’s often better to start with a young pre-bonsai.
What is the best soil mix for semi-cascade bonsai trees?
Semi-cascade trees need excellent drainage to prevent root rot, especially since the foliage hangs below the pot rim, creating a humid micro-climate. A standard akadama-based mix works well:
- 40% Akadama (retains moisture and nutrients)
- 30% Pumice (aeration and drainage)
- 30% Lava rock (structural stability)
- Optional: Add a small amount of organic bark for moisture retention in hot climates.
How do I start a semi-cascade bonsai from a seed?
Starting from seed is a long-term project (5-10 years).
- Germinate: Follow species-specific germination requirements (stratification for pines/maples).
- Grow straight: Let the seedling grow upright for 1-2 years to establish a strong root system.
- Tilt early: Once the trunk is pencil-thick, gently tilt the pot or use a wire to start the downward curve.
- Patience: The semi-cascade form takes time to develop natural taper and movement.
How long does it take to develop a semi-cascade bonsai?
It depends on the starting material:
- From seed: 10+ years for a show-quality tree.
- From nursery stock (pre-bonsai): 3-5 years to establish the basic shape.
- From a converted upright: 2-4 years to refine the curve and heal the scars.
- Remember: A “finished” bonsai is never truly finished; it’s a living art form that evolves.
What pot size is ideal for a semi-cascade bonsai?
The pot should be shallow and wide, typically oval or rectangular.
- Width: At least 2/3 the height of the tree.
- Depth: Shallow enough to emphasize the downward flow, but deep enough to support the root ball (usually 1/3 to 1/2 the tree height).
- Color: Unglazed earth tones (brown, grey, blue) are traditional, but a subtle glaze can work for flowering species.
Can you convert a upright bonsai to semi-cascade?
(See “Can I convert an upright bonsai to a semi-cascade style?” above for details.) The key is gradualism. Rushing the process leads to broken branches and a lifeless tree.
How often should I water a semi-cascade bonsai?
Watering frequency depends on the season and environment, but generally:
- Spring/Summer: Check daily. The hanging foliage creates a “shade” that can hide dry soil. Top-water thoroughly, then bottom-water to ensure the root ball is saturated.
- Autumn/Winter: Reduce frequency. The tree is dormant, and the soil stays moist longer.
- Rule of Thumb: Water when the top 1 cm of soil feels dry to the touch.
Which tree species are best for semi-cascade style?
(See “What are the best tree species for semi-cascade bonsai?” above.) Junipers and Maples are the top choices due to their flexibility and aesthetic appeal.
What is the difference between cascade and semi-cascade bonsai?
- Semi-Cascade (Han-kengai): The trunk bends downward but never drops below the bottom of the pot. The crown remains above the rim.
- Full Cascade (Kengai): The trunk grows downward and extends below the bottom of the pot, often requiring a tall, deep pot to display.
- Visual Impact: Semi-cascade is more subtle and elegant; full cascade is dramatic and theatrical.
How do you prune a semi-cascade bonsai?
- Define the flow: Identify the main downward leader.
- Remove upward growth: Prune any shoots that grow vertically, as they disrupt the downward flow.
- Create pads: Trim side branches to create triangular pads that get smaller as they go down.
- Maintain negative space: Ensure there is a clear view of the trunk between branches.
- Thin the foliage: Remove inner leaves to allow light to reach the lower branches.
📚 Reference Links
- Bonsai Empire: Origin of Bonsai Styles – Detailed explanation of Han-kengai vs. Kengai. Read here
- Wazakura Japan: Learn About Cascade and Semi-Cascade Bonsai Styles – (Note: While the specific page content was technical code in our analysis, the domain is a reputable source for Japanese bonsai culture). Visit Wazakura Japan
- International Bonsai Foundation: Bonsai Styles Guide – Comprehensive definitions and historical context. Visit IBF
- American Bonsai Society: Care and Cultivation – Expert articles on soil, watering, and species selection. Visit ABS
- Pinterest: 55 Semi-Cascade Ideas – Visual inspiration board. View Board
- Brussel’s Bonsai: Species Guide – Information on specific tree species suitable for semi-cascade. Visit Brussel’s
- Bonsai Jack: Soil Mixes – Technical data on soil components like akadama and pumice. Visit Bonsai Jack