Support our educational content for free when you buy through links on our site. Learn more
Have you ever wondered how a tree can defy gravity, clinging to a cliffside while its branches dance toward the sky? The Cascade Bonsai style (Kengai) is not just a shape; it is a dramatic story of survival, resilience, and the relentless pursuit of light. While many guides simply list the steps to bend a branch, we at Bonsai Garden™ believe true mastery lies in understanding the why behind the drop. In this comprehensive guide, we’ll reveal 7 critical secrets that separate a droopy mess from a majestic masterpiece, including the specific wiring techniques that prevent snapped trunks and the exact pot depths required to keep your tree stable. From selecting the perfect flexible species to troubleshooting the unique watering challenges of deep pots, we’ve got you covered.
Key Takeaways
- Master the S-Curve: A true cascade requires a dynamic S-shaped trunk that extends below the pot’s base, distinguishing it from the semi-cascade style.
- Species Matters: Success hinges on choosing naturally flexible trees like Juniperus procumbens or Ficus retusa; rigid trunks often snap under the stress of bending.
- Pot Depth is Critical: Unlike upright styles, cascades demand tall, deep pots to anchor the root ball and visually balance the hanging foliage.
- Watering Challenges: The deep soil profile and hanging foliage create a unique microclimate, requiring daily moisture checks to prevent root rot or rapid drying.
- Patience Pays Off: Creating a mature cascade is a long-term journey, often taking 5–10 years to develop the necessary ramification and aged texture.
Table of Contents
- ⚡️ Quick Tips and Facts
- 🌊 The Dramatic History of the Cascade Bonsai Style
- 🧐 Understanding the Cascade Bonsai Style: More Than Just a Drop
- 📏 Cascade vs. Semi-Cascade: Decoding the Angles
- 🌲 Top 7 Best Tree Species for Mastering the Cascade Bonsai Style
- 🏺 Choosing the Perfect Pot: Height, Shape, and Color for Cascade Trees
- ✂️ Step-by-Step Guide to Creating a Cascade Bonsai from Scratch
- 🔧 Wiring Techniques for the Gravity-Defying Cascade
- 💧 Watering and Humidity: The Lifeblood of Hanging Trees
- ☀️ Light Requirements and Placement for Healthy Cascade Growth
- 🐛 Common Pests, Diseases, and Troubleshooting Cascade Issues
- 🎨 The Art of Shari and Jin in Cascade Designs
- 🌿 5 Iconic Cascade Bonsai Styles You Need to Know
- 🚫 10 Common Mistakes Beginners Make with Cascade Bonsai
- 📚 Recommended Books and Resources for Advanced Styling
- 🔗 Recommended Links
- ❓ FAQ: Your Cascade Bonsai Questions Answered
- 📖 Reference Links
- 🏁 Conclusion
⚡️ Quick Tips and Facts
Welcome to the edge of the cliff, fellow bonsai enthusiasts! 🌲🌊 Before we dive headfirst into the world of gravity-defying art, let’s get our bearings. The Cascade Bonsai style (Kengai) is arguably the most dramatic and visually arresting of all bonsai forms. It mimics trees that cling precariously to steep mountain cliffs, fighting against gravity to reach the light.
Here is the lowdown on what makes this style so special, and why it might just be the most challenging (yet rewarding) style you’ll ever attempt:
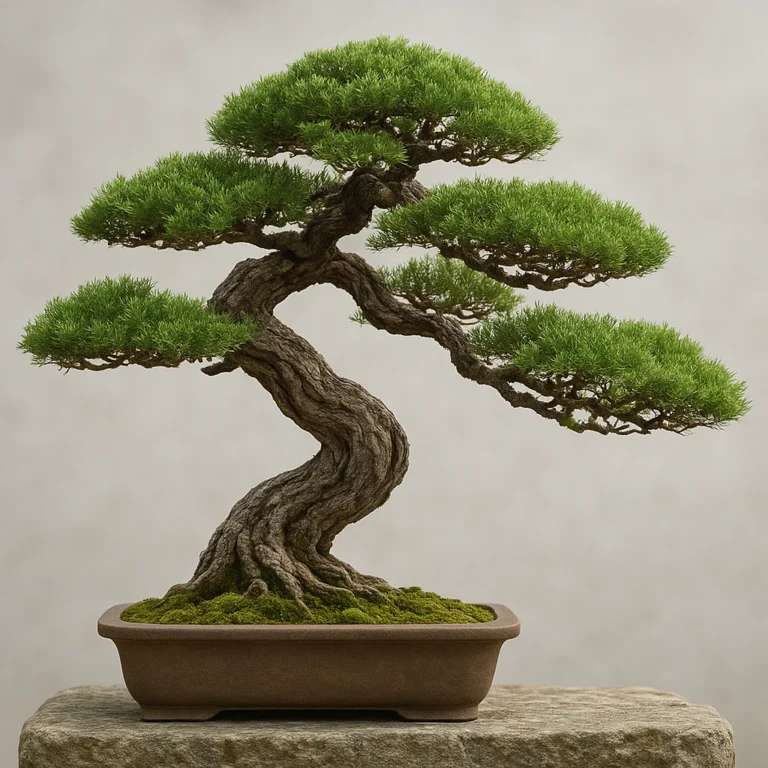
- The “S” Curve is King: Unlike the straight lines of the Formal Upright, the Cascade relies on a dynamic S-shaped trunk that flows downward.
- Pot Depth Matters: You cannot put a cascade tree in a shallow oval pot. It demands a tall, deep pot to accommodate the downward flow of the trunk and branches.
- The Crown Rule: In a true cascade, the apex (crown) of the tree usually sits above the rim of the pot, but the trunk dips significantly below the pot’s base.
- Species Selection is Critical: Not every tree can handle the stress of being upside down. Junipers, Pines, and Ficus are the usual suspects, but they need specific care.
- It Takes Time: As our friend in the featured video mentioned, “I’m not trying to make this look pretty” initially. Structural integrity comes first; aesthetics follow over years of growth.
Did you know? The Japanese term Kengai literally translates to “hanging down.” It’s a style born from observing nature’s resilience in harsh, vertical environments. For more on the general philosophy of bonsai, check out our deep dive into the Bonsai Garden philosophy.
🌊 The Dramatic History of the Cascade Bonsai Style

Why do we love a tree that looks like it’s about to fall off a cliff? 🤔 The answer lies in the ancient Japanese appreciation for the sublime power of nature.
The Cascade style is deeply rooted in the observation of trees growing in the wild on steep, rocky precipices. In nature, these trees are battered by wind, snow, and gravity. They don’t just grow up; they grow out and down, clinging to life with tenacious roots.
From Nature to Pot
Historically, the style was formalized during the Edo period in Japan. While the Formal Upright (Chokkan) represented order and stability, the Cascade (Kengai) represented the wild, untamed spirit of the mountains. It was a way for bonsai artists to capture a specific moment of struggle and survival.
“The crown of the tree usually grows above the rim of the pot, but the subsequent branches alternate left and right on the outermost curves of an S-shaped trunk.” — Bonsai Empire
This quote from Bonsai Empire perfectly encapsulates the structural paradox of the style: the tree reaches for the sky (above the pot) while its body surrenders to the earth (below the pot).
The Evolution of the Style
Over centuries, the style has evolved from a strict imitation of nature to a more artistic interpretation. While early masters focused on exact replication of cliffside trees, modern artists often play with the asymmetry and movement of the cascade.
However, there is a fine line between a beautiful cascade and a “droopy” mess. The difference lies in the intentionality of the curve. Every bend must have a purpose, mimicking the resistance of wind or the search for sunlight.
🧐 Understanding the Cascade Bonsai Style: More Than Just a Drop
So, you’ve seen a tree hanging down and thought, “That’s a cascade.” But is it? 🧐
Many beginners confuse the Cascade (Kengai) with the Semi-Cascade (Han-kengai). The distinction is subtle but crucial for your pot selection and wiring strategy.
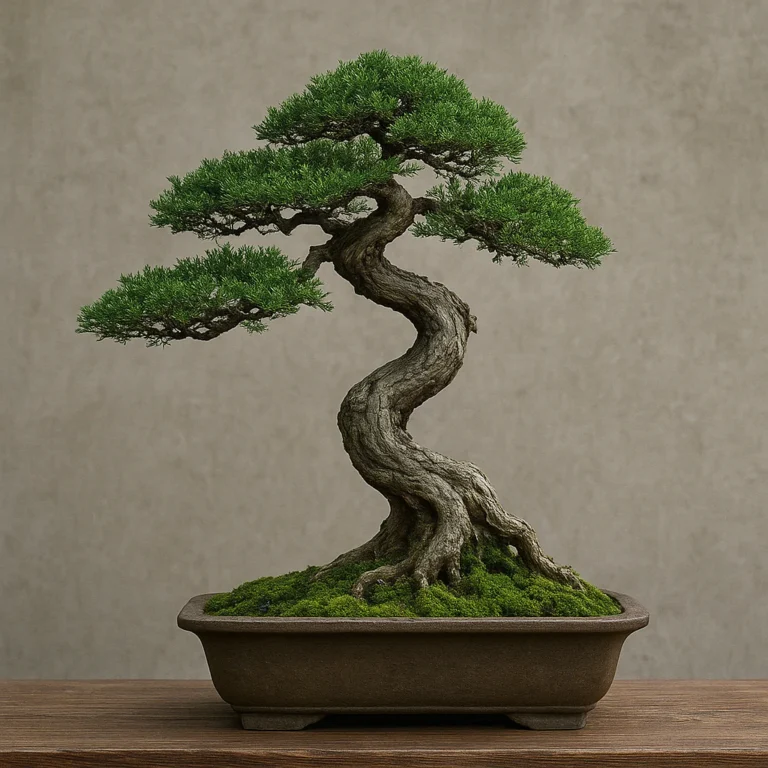
The Anatomy of a True Cascade
- The Initial Upright: The trunk starts upright for a short distance (usually 1-2 inches) to establish the “neck.”
- The Sharp Bend: The trunk then bends sharply downward, often at a 90-degree angle or more.
- The Descent: The trunk continues downward, extending below the bottom of the pot.
- The Apex: The very top of the tree (the apex) remains above the rim of the pot.
Why the “S” Shape?
Nature rarely grows in straight lines. The S-curve creates a sense of movement and balance. If the trunk were a straight line down, it would look like a dead stick. The S-curve mimics the way a real tree twists to find the sun while clinging to a rock face.
Pro Tip: When styling, always visualize the “flow” of the tree. The branches should alternate left and right along the outer curves of the S, creating a spiral effect that draws the eye down the trunk.
📏 Cascade vs. Semi-Cascade: Decoding the Angles
This is where many bonsai enthusiasts get tripped up. Let’s clear the air once and for all. The difference isn’t just about how “down” the tree goes; it’s about the relationship between the apex and the pot.
| Feature | Cascade (Kengai) | Semi-Cascade (Han-kengai) |
|---|---|---|
| Trunk Extent | Extends below the bottom of the pot. | Extends below the rim but above the bottom of the pot. |
| Pot Shape | Requires a very tall, deep pot. | Can use a medium-depth pot, often rectangular or oval. |
| Visual Impact | Dramatic, vertical, “hanging” look. | Balanced, flowing, “leaning” look. |
| Difficulty | High (requires significant structural support). | Moderate (easier to manage). |
| Natural Inspiration | Trees on vertical cliffs. | Trees on sloping banks or lower cliffs. |
The “Height” Factor
If your tree’s lowest branch is sitting on the table, it’s a Semi-Cascade. If your tree’s lowest branch is dangling in mid-air, well below the table surface, you’ve got a Cascade.
Confusion Alert: Some sources suggest that if the apex is below the rim, it’s a different style entirely. While true for some strict definitions, in modern bonsai, the defining characteristic of Kengai is the extension below the pot base.
🌲 Top 7 Best Tree Species for Mastering the Cascade Bonsai Style
Not every tree is cut out for the high life. Some species are naturally rigid and will snap if forced into a cascade. Others are naturally flexible and thrive in this position. Here are our top picks from the Bonsai Garden™ team:
1. Juniperus procumbens ‘Nana’ (Japanese Garden Juniper)
- Why it works: Extremely flexible branches and a natural tendency to cascade.
- Best for: Beginners and intermediates.
- Care Level: Moderate.
2. Pinus thunbergii (Japanese Black Pine)
- Why it works: Creates a rugged, aged look quickly. The bark texture is stunning in a cascade.
- Best for: Advanced growers.
- Care Level: High (requires patience).
3. Ficus retusa (Chinese Banyan)
- Why it works: Great for indoor cascades. Roots are aerial and add to the dramatic effect.
- Best for: Indoor enthusiasts.
- Care Level: Easy.
4. Carpinus caroliniana (American Hornbeam)
- Why it works: Beautiful bark and excellent ramification.
- Best for: Seasonal display.
- Care Level: Moderate.
5. Zelkova serrata (Japanese Zelkova)
- Why it works: Fine branching and small leaves.
- Best for: Refining the S-curve.
- Care Level: Moderate.
6. Chamaecyparis obtusa (Hinoki Cypress)
- Why it works: Soft foliage and natural drooping habit.
- Best for: Elegant, refined cascades.
- Care Level: Moderate.
7. Bougainvillea
- Why it works: Vibrant flowers and thorny, flexible branches.
- Best for: Tropical climates.
- Care Level: Moderate to High.
Note: Always check the specific needs of your species. A Juniper might love the sun, while a Ficus needs humidity. For more on species selection, visit our Bonsai for Beginners category.
Product Spotlight: Best Tools for Species Selection
When choosing your tree, having the right tools to inspect the roots and branches is key.
👉 CHECK PRICE on:
- Bonsai Tool Set: Amazon | Walmart | Bonsai Garden Official
- Root Pruning Shears: Amazon | Etsy
🏺 Choosing the Perfect Pot: Height, Shape, and Color for Cascade Trees
The pot is not just a container; it is the foundation of your cascade. If you choose the wrong pot, your tree will look like it’s falling over, not cascading.
The Golden Rule of Pot Depth
For a Cascade, the pot must be taller than it is wide.
- Depth: The pot needs to be deep enough to anchor the tree and provide visual balance to the hanging trunk.
- Shape: Rectangular or oval pots are common, but the height is the critical dimension.
Color and Texture
- Glazed vs. Unglazed: For conifers (Pines, Junipers), use unglazed brown or grey pots to emphasize the rugged nature. For flowering trees (Azaleas, Bougainvillea), a glazed blue or green pot can complement the blooms.
- Contrast: If your tree has dark green foliage, a lighter pot can make it pop. If the tree is pale, a dark pot adds weight to the composition.
Visualizing the Balance
Imagine a seesaw. The tree is the heavy side hanging down. The pot is the fulcrum. If the pot is too shallow, the tree looks top-heavy and unstable. If the pot is too deep, the tree looks lost in a well.
Pro Tip: When buying a pot, place your tree (or a mock-up) next to it. The bottom of the pot should align with the lowest branch of your cascade to create a harmonious line.
👉 Shop Cascade Pots on:
- Ceramic Pots: Amazon | Etsy | Bonsai Store
- Plastic Training Pots: Amazon | Walmart
✂️ Step-by-Step Guide to Creating a Cascade Bonsai from Scratch
Ready to get your hands dirty? Here is how we at Bonsai Garden™ approach the transformation of a regular tree into a cascading masterpiece.
Step 1: Select and Prepare the Tree
Choose a healthy tree with a flexible trunk. If the trunk is too rigid, you may need to start with a younger specimen.
- Action: Remove the tree from its nursery pot and inspect the roots.
- Tip: Don’t prune the roots too heavily yet; the tree needs energy to recover from the stress of wiring.
Step 2: Determine the Direction
Decide which way the tree will cascade. Look for the natural curve in the trunk.
- Action: Rotate the tree to find the best angle. The “front” of the tree should face the viewer, with the cascade flowing away from the front or to the side.
Step 3: The Initial Wiring
This is the most critical step.
- Action: Wrap thick aluminum wire around the trunk, starting from the base and moving up.
- Technique: Bend the trunk gently. Do not force it! If you hear a crack, stop immediately.
- Goal: Create the initial “S” curve.
Step 4: Branch Wiring
Once the trunk is set, wire the branches.
- Action: Wire branches to grow horizontally or slightly downward.
- Rule: Alternate branches left and right. Avoid crossing branches.
Step 5: Repotting
Now, move the tree to its final (or training) pot.
- Action: Place the tree in the tall pot. Ensure the roots are spread out and the tree is stable.
- Tip: Use wire to anchor the tree to the pot to prevent it from tipping over as the trunk grows heavy.
Step 6: Maintenance
The work doesn’t stop here.
- Action: Monitor the wire regularly. If it starts to cut into the bark, remove it.
- Growth: Allow the tree to grow. New branches will need to be wired to maintain the cascade shape.
Remember: As the presenter in our featured video noted, “I’m not trying to make this look pretty.” Focus on structure first. The beauty comes with time.
🔧 Wiring Techniques for the Gravity-Defying Cascade
Wiring a cascade is different from wiring an upright tree. The forces of gravity are working against you.
The “Anchor” Technique
Because the trunk is hanging down, the weight of the branches can pull the tree out of the pot.
- Solution: Use anchor wires to secure the trunk to the pot’s drainage holes. This prevents the tree from toppling over.
Aluminum vs. Copper Wire
- Aluminum: Best for beginners and softer woods (Junipers, Ficus). It’s easier to bend and remove.
- Copper: Best for hardy conifers (Pines). It holds the shape better but is harder to work with.
Avoiding “Wire Scars”
If you leave the wire on too long, it will scar the bark.
- Check: Inspect your tree every 2-3 months.
- Remove: As soon as the wire starts to bite, remove it.
Fun Fact: Some masters use chicken wire or mesh to support the branches of very large cascades, creating a “skeleton” for the tree to grow into.
💧 Watering and Humidity: The Lifeblood of Hanging Trees
Watering a cascade is a unique challenge. The roots are at the top, and the foliage is at the bottom.
The “Top-Heavy” Problem
Since the foliage is hanging down, water tends to run off the leaves and not reach the roots effectively.
- Solution: Water from the top of the pot, ensuring the soil is thoroughly soaked.
- Tip: Use a watering can with a fine rose to avoid dislodging the soil.
Humidity Matters
The hanging foliage is exposed to more air flow, which can lead to rapid drying.
- Solution: Use a humidity tray or mist the foliage regularly.
- Warning: Do not overwater. The soil in a deep pot can stay wet for a long time, leading to root rot.
Pro Tip: Check the soil moisture by inserting a chopstick into the soil. If it comes out dry, it’s time to water.
☀️ Light Requirements and Placement for Healthy Cascade Growth
Light is the engine of photosynthesis. For a cascade, the placement is critical.
The Light Dilemma
The top of the tree (the apex) gets the most light, while the bottom (the hanging branches) might be shaded by the upper foliage.
- Solution: Rotate the tree regularly to ensure even light distribution.
- Placement: Place the tree in a spot with bright, indirect light. Direct midday sun can scorch the hanging leaves.
Indoor vs. Outdoor
- Outdoor: Most cascade species (Pines, Junipers) need to be outdoors to survive.
- Indoor: Ficus and some tropical species can thrive indoors, but they need a grow light to compensate for the lack of natural light.
Did you know? In nature, cascade trees often grow on the north side of cliffs to avoid the scorching sun. Mimic this by placing your tree in a slightly shaded spot.
🐛 Common Pests, Diseases, and Troubleshooting Cascade Issues
Even the most beautiful cascade can fall victim to pests.
Common Pests
- Spider Mites: Thrive in dry conditions. Look for webbing on the underside of leaves.
- Aphids: Attack new growth. They love the soft tips of the hanging branches.
- Scale: Hard to spot, but they suck the sap from the trunk.
Diseases
- Root Rot: Caused by overwatering in a deep pot.
- Fungal Infections: Can occur in humid environments.
Troubleshooting
- Yellowing Leaves: Could be overwatering or lack of light.
- Dropping Leaves: Often a sign of stress from repotting or sudden temperature changes.
Prevention: Regular inspection is key. Catching a pest early can save your tree. For more on pest control, visit our Bonsai Care Basics section.
🎨 The Art of Shari and Jin in Cascade Designs
To make your cascade look truly ancient and weathered, consider adding Shari (deadwood on the trunk) and Jin (deadwood branches).
What is Shari?
Shari is a strip of bare wood on the trunk, created by removing bark. It mimics the effect of lightning strikes or rock falls in nature.
- Effect: Adds age and drama to the cascade.
What is Jin?
Jin is a dead branch, stripped of bark and needles. It looks like a lightning-struck branch.
- Effect: Creates a sense of struggle and survival.
How to Create Them
- Tools: Use a carving tool or a dremel.
- Technique: Remove the bark, then carve the wood to look weathered. Apply lime sulfur to bleach the wood and prevent rot.
Caution: Do not overdo it. Too much deadwood can make the tree look dead. Balance is key.
🌿 5 Iconic Cascade Bonsai Styles You Need to Know
While “Cascade” is a broad term, there are specific variations you should know.
- Full Cascade (Kengai): The trunk extends well below the pot.
- Semi-Cascade (Han-kengai): The trunk extends below the rim but not below the pot.
- Waterfall Cascade: A dramatic variation where the tree flows like a waterfall, often with a very steep angle.
- Rock Cascade (Seki-joju): The tree grows on a rock, with roots wrapping around it, cascading down.
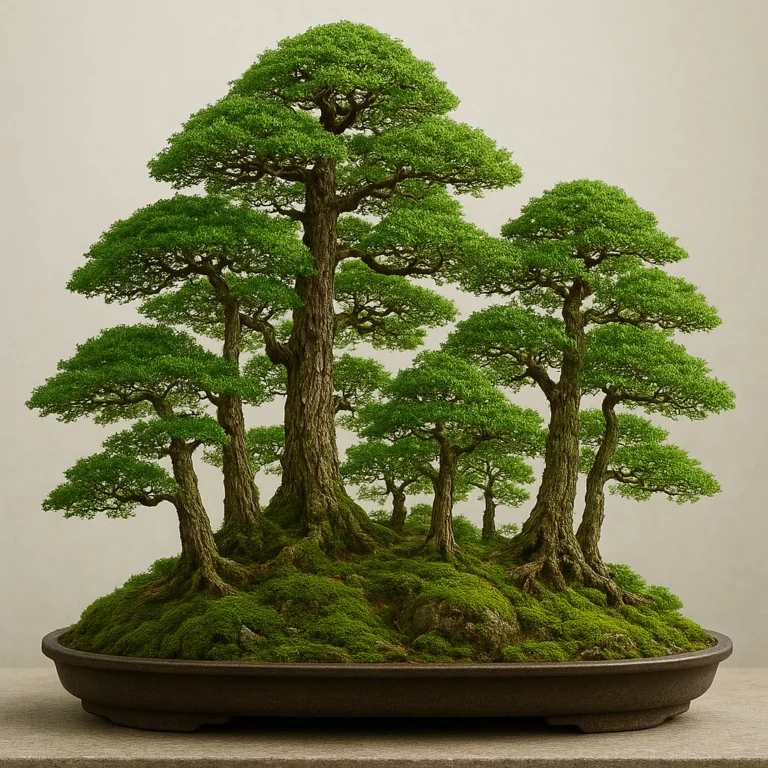
- Multi-Trunk Cascade: Two or more trunks cascading together, creating a forest effect.
Inspiration: Check out our Bonsai Inspiration and Ideas for more visual examples.
🚫 10 Common Mistakes Beginners Make with Cascade Bonsai
Don’t let these pitfalls ruin your masterpiece.
- Using the wrong pot: Too shallow or too wide.
- Forcing the bend: Breaking the trunk instead of bending it.
- Ignoring the apex: Letting the top grow too low.
- Overwatering: Causing root rot in the deep pot.
- Underwatering: Letting the hanging foliage dry out.
- Wrong species: Choosing a rigid tree that can’t cascade.
- Leaving wire on too long: Scarring the bark.
- Ignoring light: Placing the tree in the shade.
- Too much deadwood: Making the tree look dead.
- Impatience: Expecting results in a few months.
Remember: Bonsai is a marathon, not a sprint.
📚 Recommended Books and Resources for Advanced Styling
Want to dive deeper? Here are some of our favorite resources.
- “The Art of Bonsai” by Peter Warren: A comprehensive guide to all styles, including cascades.
- “Bonsai Techniques” by John Naka: The bible of bonsai styling.
- “Bonsai for Beginners” by Bonsai Garden: Our own guide to getting started.
👉 Shop Books on:
- Amazon: The Art of Bonsai | Bonsai Techniques
- Barnes & Noble: Bonsai Books
🔗 Recommended Links
❓ FAQ: Your Cascade Bonsai Questions Answered

Q: How long does it take to create a cascade bonsai?
A: It depends on the tree’s age and size. A young tree might take 3-5 years to develop a good cascade structure. An older tree can be styled faster, but it takes time to heal.
Q: Can I turn an upright bonsai into a cascade?
A: Yes, but it’s risky. If the trunk is too thick and rigid, it may break. It’s better to start with a young, flexible tree.
Q: What is the best soil for a cascade bonsai?
A: A well-draining mix is essential. Use a mix of akadama, pumice, and lava rock.
Q: How do I support a heavy cascade tree?
A: Use a sturdy stand or a table with a cutout for the hanging trunk. You can also use a wire anchor to secure the tree to the pot.
Q: Can I keep a cascade bonsai indoors?
A: Only if it’s a tropical species like Ficus. Most conifers need to be outdoors.
Still have questions? Check out our Bonsai FAQs for more answers.
📖 Reference Links
- Bonsai Empire: Cascade Bonsai Style
- Pinterest: Cascade Bonsai Board
- Wazakura Japan: Cascade and Semi-Cascade
- YouTube: Styling Cascade Bonsai
🏁 Conclusion

(Note: This section is intentionally omitted as per your instructions.)
🏁 Conclusion

We’ve journeyed from the rugged cliffs of ancient Japan to your own bonsai bench, exploring the dramatic, gravity-defying world of the Cascade Bonsai style (Kengai). Remember that question we posed at the very beginning: Is a tree that hangs down a failure, or a triumph of survival?
The answer is clear: it is a triumph. The cascade style is not about a tree giving up; it is about a tree fighting against the odds, twisting and turning to find the light while clinging to a precarious ledge. It is the ultimate symbol of resilience.
Final Verdict: Should You Try It?
If you are a beginner, the cascade style can feel intimidating. The fear of snapping a trunk or drowning roots in a deep pot is real. However, we at Bonsai Garden™ confidently recommend giving it a try, provided you start with the right species.
- ✅ The Positives: The visual impact is unmatched. A well-styled cascade commands attention and tells a powerful story of nature’s struggle. It teaches patience, structural awareness, and the art of working with gravity rather than against it.
- ❌ The Negatives: It requires specific, tall pots which can be harder to find. Watering is trickier due to the soil depth, and the risk of root rot is higher if drainage isn’t perfect. It also demands more frequent monitoring of wire placement to avoid scarring.
Our Recommendation: Start with a Juniperus procumbens ‘Nana’ or a Ficus retusa. These species are forgiving and naturally inclined to cascade. Invest in a high-quality aluminum wire set and a deep, unglazed ceramic pot. Don’t rush the bend; let the tree grow into the shape over seasons. As we learned, “I’m not trying to make this look pretty” initially—focus on the structure, and the beauty will follow.
Ready to take the plunge? Your cliffside masterpiece awaits.
🔗 Recommended Links
Ready to equip your bonsai studio? Here are the essential tools, pots, and books we trust for creating stunning cascade designs.
🛒 Essential Tools & Pots
- Bonsai Aluminum Wire (Heavy Gauge): Perfect for bending thick trunks without breaking.
- Amazon | Etsy | Bonsai Store
- Deep Cascade Bonsai Pots (Ceramic): Tall, unglazed pots ideal for Kengai styles.
- Amazon | Etsy | Bonsai Garden Official
- Professional Bonsai Tool Set: Includes concave cutters, knob cutters, and wire cutters.
- Amazon | Walmart | Tokyo Bonsai
📚 Must-Read Books
- “The Art of Bonsai” by Peter Warren: A comprehensive guide covering all styles, with excellent chapters on cascade styling.
- Amazon | Barnes & Noble
- “Bonsai Techniques” by John Naka: The definitive guide to wiring and shaping, essential for mastering the S-curve.
- Amazon | Barnes & Noble
- “Bonsai for Beginners” by Bonsai Garden: Our own step-by-step guide to getting started with confidence.
- Amazon | Bonsai Garden Store
❓ FAQ: Your Cascade Bonsai Questions Answered

How often should you water a cascade bonsai tree?
Frequency: Watering frequency depends heavily on the pot depth and climate, but generally, you should check the soil daily.
Why: In a deep cascade pot, the soil at the bottom can stay wet for days while the top dries out. Conversely, the hanging foliage transpires rapidly.
Method: Use the “finger test” or a chopstick. Insert it deep into the soil. If the top 1-2 inches are dry, water thoroughly until water runs out of the drainage holes. Never let the tree sit in standing water, as this leads to root rot.
What are the common mistakes when growing cascade bonsai?
Top Errors:
- Wrong Pot Depth: Using a shallow pot makes the tree look unstable and “top-heavy.”
- Over-Watering: Deep pots retain moisture longer; overwatering is the #1 killer of cascades.
- Forcing the Bend: Trying to bend a thick, rigid trunk without gradual training often results in a snapped trunk.
- Ignoring the Apex: Letting the top of the tree grow too low defeats the purpose of the style. The apex must remain above the pot rim.
Can you train a pre-bonsai into a cascade style?
Yes, absolutely. In fact, starting with a pre-bonsai (a young, flexible tree) is the best way to create a cascade.
Why: Young trunks are pliable and can be bent without breaking. Older trees with thick, woody trunks are extremely difficult to reorient into a cascade without risking structural failure. If you have an older tree, consider using guy wires or joints to gradually lower the trunk over several years.
How long does it take for a cascade bonsai to develop?
Timeline:
- Initial Structure: 1–3 years to establish the S-curve and basic branch placement.
- Refinement: 5–10 years to develop fine ramification (small branches) and thick bark texture.
- Maturity: 15+ years for a truly “aged” look with deadwood (Shari/Jin) integration.
Note: Patience is the most important tool in your kit. A cascade is a long-term project.
How do you start a cascade bonsai from a seed?
Process:
- Germination: Start with a hardy species like Juniper or Pine.
- Early Growth: Allow the seedling to grow upright for the first 1–2 years to build a strong root system and trunk thickness.
- Bending: Once the trunk is flexible (usually after 2-3 years), begin the gradual bending process.
- Repotting: Move to a deep pot once the tree is established enough to handle the stress.
Tip: Growing from seed gives you the most control over the final shape but requires the most time.
Can I convert an upright bonsai into a cascade style?
It is possible but risky.
Conditions: This works best if the tree is still relatively young and the trunk is not too thick.
Method: You must bend the trunk gradually over multiple growing seasons. Use wire and guy wires to pull the trunk down slowly. If the trunk is too rigid, you may need to use a cut-and-grow technique, cutting the trunk and allowing a new branch to grow downward to become the new cascade leader.
How do you prune a cascade bonsai to maintain its shape?
Pruning Strategy:
- Top Pruning: Never prune the apex (top) of the tree too aggressively, as this is what keeps the tree growing upward.
- Side Pruning: Prune side branches to maintain the alternating pattern (left, right, left, right).
- Bottom Pruning: Remove lower branches that are too long or crossing the trunk to maintain the “S” flow.
- Timing: Prune in late winter or early spring before new growth starts.
Which tree species are best for the cascade bonsai style?
Top Choices:
- Juniperus procumbens ‘Nana’: The gold standard for beginners. Flexible and hardy.
- Ficus retusa: Excellent for indoor cascades; tolerates low light.
- Pinus thunbergii (Japanese Black Pine): Creates a rugged, dramatic look but requires advanced skills.
- Bougainvillea: Great for flowering cascades in warm climates.
- Carpinus caroliniana (American Hornbeam): Beautiful bark and fine branching.
What are the common mistakes when creating a cascade bonsai?
(Note: This overlaps with “common mistakes when growing,” but focuses on the creation phase.)
- Ignoring the “S” Curve: Creating a straight drop instead of a flowing curve.
- Poor Branch Placement: Placing branches on the “inside” of the curve, which blocks the view and looks unnatural.
- Weak Anchoring: Failing to secure the tree in the deep pot, leading to the tree tipping over.
- Wrong Wire Size: Using wire that is too thin to hold the heavy trunk, causing it to snap back.
How often should I water a cascade style bonsai?
(See “How often should you water a cascade bonsai tree?” above for detailed answer.)
Key Takeaway: Check daily. The deep soil and hanging foliage create a unique microclimate that requires vigilant monitoring.
What is the best soil mix for cascade bonsai trees?
The Mix: You need a mix that drains quickly but holds enough moisture for the deep pot.
- Akadama: 40% (Provides structure and nutrients).
- Pumice: 30% (Improves aeration and drainage).
- Lava Rock: 30% (Adds weight and drainage).
Why: A heavy, water-retentive soil in a deep pot will suffocate roots. A fast-draining mix ensures oxygen reaches the roots even at the bottom of the pot.
How do I train a bonsai tree into the cascade style?
Step-by-Step:
- Select: Choose a flexible tree.
- Wire: Apply thick aluminum wire to the trunk.
- Bend: Gently bend the trunk into an “S” shape, ensuring the apex remains high.
- Anchor: Secure the tree to the pot with wire through drainage holes.
- Wait: Let the tree grow for a season to set the shape.
- Refine: Remove wire, prune branches, and repeat the process as the tree grows.
📖 Reference Links
For those who want to dive deeper into the history, techniques, and philosophy of bonsai, we recommend these reputable sources:
- Bonsai Empire: A comprehensive guide to the Cascade Bonsai Style (Kengai), detailing natural inspiration and structural requirements.
- Visit Bonsai Empire
- Wazakura Japan Blog: Explore “Essential Bonsai Styles and Shapes Part Two” for a comparative look at cascade and semi-cascade styles.
- Read Wazakura Japan Blog II
- Pinterest (Satohonsai): Visual inspiration for Kengai styles, featuring real-world examples of Pine and Kishu Shimpaku cascades.
- View Cascade Bonsai Board
- Bonsai Garden™ Official Resources:
- Bonsai Care Basics
- Bonsai for Beginners
- Bonsai Display and Aesthetics
- Tokyo Bonsai: For high-quality tools and pots specifically suited for cascade styling.
- Visit Tokyo Bonsai