Support our educational content for free when you buy through links on our site. Learn more

Creating bonsai root flare starts with a healthy tree, careful root placement, and gradual pruning at the right time—not one dramatic cut. With patient work over successive repoting cycles, you can encourage surface roots to spread around the trunk and build a balanced, natural-looking nebari.
The best time to start is while a tree is young, when its roots are easier to inspect and redirect. We’ve seen bonsai owners get excited about uncovering a dramatic flare, only to discover that a few minutes with a chopstick and a little patience would have served the tree better than aggressive digging.
Think of nebari as the tree’s handshake with the soil: it should look secure, balanced, and entirely its own. Here’s how to create that look without putting the roots at risk.
Key Takeaways
- Start with a vigorous tree and do root-flare work at a suitable repoting time for its species and climate.
- Spread healthy roots radially and selectively shorten dominant, crossing, or downward-growing roots.
- Preserve fine feeder roots and avoid removing too much root in one session.
- Use grow boxes, training pots, or a flat board to help young roots develop outward over time.
- Treat tourniquet methods, root grafting, and air layering as advanced techniques that require careful monitoring.
- Expect gradual results: a mature, balanced nebari may take several growing seasons to develop.
Table of Contents
- ⚡️ Quick Tips and Facts
- 🌳 What Is Bonsai Root Flare (Nebari)?
- Root flare, nebari, and surface roots: what’s the difference?
- Why a convincing root flare matters to your bonsai
- 🕰️ How Root Flare Develops: The Basics of Nebari
- How trunk taper and surface roots shape the base
- Species, age, and growing conditions
- 🔍 Assess Your Bonsai’s Roots Before You Begin
- When to expose and work on surface roots
- Tools and supplies for root-flare work
- How to inspect roots without damaging the tree
- 🧭 Plan a Balanced Nebari
- Choose the front and set the root-flare design
- Identify strong, weak, crossing, and downward-growing roots
- Set realistic goals for your species and tree
- 🛠️ 9 Ways to Create and Improve Bonsai Root Flare
- 1. Develop the tree in a grow box or training pot
- 2. Plant over a flat board or tile
- 3. Radially arrange roots during repoting
- 4. Prune and shorten vigorous roots selectively
- 5. Encourage fine feeder roots near the trunk
- 6. Use the tourniquet method with care
- 7. Create a root graft to fill a bare section
- 8. Air-layer above a poor or damaged root base
- 9. Improve root visibility with gradual soil removal
- ✂️ Regular Root Pruning for a Wider, Healthier Nebari
- Root-pruning steps at repoting
- How much root to remove—and when to stop
- Repoting depth, soil mix, and root placement
- 🌱 Care After Root-Flare Work
- Watering, light, and shelter after repoting
- Fertilizing and recovery timing
- How to protect exposed roots from drying and damage
- 🌲 Species-Specific Root-Flare Advice
- Maple, elm, and other deciduous bonsai
- Pine, juniper, and other conifers
- Ficus and tropical bonsai
- 🚫 Common Nebari Mistakes and How to Fix Them
- One-sided roots and empty gaps
- Crossing, tangled, or overly thick roots
- Reverse taper, buried flare, and exposed-root stress
- Over-pruning and working at the wrong time
- 📅 Root-Flare Development Timeline and Progress Checks
- What to expect after one season and over several years
- How to track root growth and adjust your plan
- ❓ FAQ
- ✅ Conclusion
- 🔗 Recommended Links
- 📚 Reference Links
⚡️ Quick Tips and Facts
A convincing root flare doesn’t appear after one heroic pruning session. It’s built through years of careful root selection, radial placement, and steady growth—rather like teaching a small, enthusiastic octopus to stand neatly around a trunk. If you’re new to the subject, our Bonsai Garden guide and bonsai care basics are useful companions.
| Quick fact | What it means for your tree |
|---|---|
| Nebari means the visible surface-root spread at the base of a bonsai. | Good nebari helps the trunk look stable and visually connected to the soil. |
| Root flare work is usually done during repoting, when the tree is healthy and the timing suits its species. | Don’t dig around or prune roots just because you’re curious on a hot afternoon. |
| The goal is a radial, balanced arrangement, not a perfectly symmetrical starburst. | Natural variation looks convincing; crossing roots and large empty gaps often don’t. |
| Downward-growing roots can be shortened selectively to encourage a flatter, spreading root system. | Keep enough healthy roots to support recovery. |
| Young trees are often easier to shape than old, established ones. | Start early when possible; improve older trees gradually. |
| Strong growth is essential. | A weak, recently collected, diseased, or stressed tree is a poor candidate for major root work. |
Our quick rules: ✅ Work on a vigorous tree. ✅ Use clean, sharp tools. ✅ Preserve fine feeder roots. ❌ Don’t remove every downward root in one go. ❌ Don’t expose roots to drying wind or sun. For timing and general aftercare, consult Bonsai Empire’s repoting guide and Royal Horticultural Society advice on bonsai.
🌳 What Is Bonsai Root Flare (Nebari)?
Nebari is the visible spread of roots where the trunk meets the soil. In bonsai design, it gives the tree a sense of anchorage and age: instead of looking like a trunk stuck into a pot, the tree appears to grow naturally from the ground.
Bonsai Empire describes surface roots as contributing to a tree’s “sense of stability.” That’s a useful way to think about the effect: the roots are both living structures and visual architecture. Their actual job is to absorb water and nutrients and anchor the tree, as explained by the University of Minnesota Extension’s overview of tree roots.
Root flare, nebari, and surface roots: what’s the difference?
The terms overlap, but they’re not quite identical:
- Root flare: The widening transition at the base of the trunk, often including the first major roots.
- Nebari: The bonsai term for the visible, spreading root base and its overall design.
- Surface roots: Roots visible at or just above the soil surface. These make up much of the nebari but may extend farther from the trunk.
A good nebari usually has roots that radiate outward, taper as they travel, and gradually disappear into the soil. Growing Bonsai describes this gradual transition as a key feature of a natural-looking flare. Roots that stop abruptly at the edge of the soil can look less like a living tree and more like someone laid down a handful of licorice strings.
Why a convincing root flare matters to your bonsai
Root flare influences both visual balance and practical root health:
- It makes the trunk look securely anchored.
- It can improve the transition between trunk and soil line.
- A well-managed root system offers space for many fine feeder roots.
- It can help create a convincing impression of age and maturity.
Nebari isn’t a substitute for good horticulture. A dramatic flare on a struggling tree is not a win. The tree’s roots must still function well, and its health takes priority over cosmetic refinement.
🕰️ How Root Flare Develops: The Basics of Nebari
A young tree’s roots don’t naturally arrive in a tidy radial pattern. They grow in response to the tree’s biology and growing conditions, and they may become lopsided, congested, or strongly downward-growing. Bonsai training redirects that growth over repeated growing cycles.
Growing Bonsai notes that seedlings may develop a deep taproot early in life, while lateral roots become more prominent as the tree matures. The exact pattern varies by species and conditions; root behavior is not a clockwork schedule.
How trunk taper and surface roots shape the base
A well-proportioned base usually has:
- Roots spreading in different directions around the trunk.
- Strong roots near the trunk that become finer or less visible as they travel outward.
- A trunk that transitions naturally into the root base, without a sudden narrow neck or swollen ring.
- Enough variation to look organic, without one oversized root dominating the design.
There’s no magic number of roots. Growing Bonsai suggests roughly 8–18 roots for a full circle as a broad visual reference, but the right number depends on trunk size, species, root thickness, and the intended style. Treat that range as a sketching aid—not a horticultural quota.
Species, age, and growing conditions
Some trees produce fine, readily ramifying roots; others develop thick roots or respond slowly to root reduction. Age matters, too: a young tree often gives you more options because its root structure is still being developed.
| Factor | Likely influence | Practical response |
|---|---|---|
| Species | Root growth and tolerance of pruning vary. | Confirm species-specific timing before repoting. |
| Tree vigor | Strong trees generally recover better from root work. | Delay major work on weak or stressed trees. |
| Container and soil | Root space, drainage, and oxygen affect growth. | Use a suitable training container and a free-draining bonsai mix. |
| Climate | Seasonal timing differs by region. | Follow local bud development and weather, not a fixed calendar date. |
| Age and history | Older roots may be woody and harder to redirect. | Make gradual improvements across multiple repottings. |
🔍 Assess Your Bonsai’s Roots Before You Begin
Before you prune, find out what you’re working with. At the next appropriate repoting, gently remove soil from the root base and map the roots. Don’t yank the tree from its pot midseason just to take a peek.
When to expose and work on surface roots
The safest time depends on species, climate, and the tree’s condition. Many deciduous trees are repotted as buds begin to swell, but evergreens and tropical species can need different timing. Follow reliable species-specific guidance, such as Bonsai Empire’s repoting advice, and ask an experienced local bonsai club when your climate complicates the schedule.
Avoid major root work when the tree is:
- Recently collected or newly acquired and still adapting.
- Weak, dehydrated, diseased, or pest-infested.
- In active heat stress or facing severe weather.
- Recovering from another major operation, such as heavy pruning or wiring.
Tools and supplies for root-flare work
Good tools make careful work easier. They don’t make aggressive work safer.
- Root hook or chopstick for loosening soil.
- Sharp bonsai shears for small roots.
- Concave cutters for appropriate woody roots.
- Root rake or small brush for teasing out the root mass.
- Clean water, chopsticks, and prepared bonsai soil.
- Raffia or soft ties to hold roots in position when appropriate.
We use Toyo Steel toolboxes to keep small tools organized and choose tools from established bonsai suppliers such as Kikuwa or Joshua Roth. Clean tools between trees; disinfectant guidance for garden tools is available from the University of Minnesota Extension.
How to inspect roots without damaging the tree
- Prepare first. Have the new container, soil, ties, and tools ready so the roots aren’t left exposed while you rummage.
- Remove the tree carefully. Support the root ball and loosen the container rather than pulling hard on the trunk.
- Work gradually. Tease away soil from the outer root mass with a chopstick or root hook.
- Keep roots moist. Protect exposed roots from sun and drying wind.
- Map the base. Note the direction, thickness, and condition of each major root.
- Stop if you find trouble. Rotten roots, poor vigor, or a badly congested base may call for a conservative repot rather than a design overhaul.
🧭 Plan a Balanced Nebari
Think of the root base as a compass. You want roots to occupy the space around the trunk, but not in a rigid, identical pattern. Balance is more important than symmetry.
Choose the front and set the root-flare design
Before pruning, view the tree from several angles. Choose a likely front based on trunk movement, taper, branch placement, and root spread. Then decide which roots support that view and which create distractions.
Make a simple sketch or take photos. We’ve found that a quick drawing prevents the classic “I thought that root went the other way” surprise after the tree is back in its pot.
Identify strong, weak, crossing, and downward-growing roots
Sort roots into broad categories:
- Keep: Healthy roots that extend outward and help fill an open sector.
- Shorten: Long roots that dominate, cross others, or extend far beyond the intended footprint.
- Redirect: Flexible young roots that can be positioned radially.
- Remove selectively: Dead, damaged, severely crossing, or strongly downward-growing roots, if the tree can safely tolerate their removal.
Don’t automatically remove every root that points down. It may be important to the tree’s health, especially if the rest of the root system is sparse.
Set realistic goals for your species and tree
A young, vigorous maple may offer many opportunities for root refinement. An old conifer with thick, established roots may need a slower plan. The American Bonsai Society and local bonsai clubs can help you understand species-specific limits.
A useful goal for one repoting might be modest: improve two roots, shorten one dominant root, and leave the rest alone. That may sound unglamorous, but trees prefer steady negotiation to surprise surgery.
🛠️ 9 Ways to Create and Improve Bonsai Root Flare
There’s no single technique that suits every tree. The most reliable approach is usually gradual root selection during regular repoting. More advanced methods, such as root grafting and air layering, can address specific problems but carry extra risk.
1. Develop the tree in a grow box or training pot
A training pot or well-drained grow box provides room for growth while allowing you to organize the roots. It can be more practical than putting a developing tree straight into a shallow display pot.
- Choose a container with adequate drainage.
- Spread healthy roots outward rather than bunching them underneath the trunk.
- Secure the tree so it cannot rock.
- Let the tree grow strongly before the next refinement.
- Reassess the root arrangement at a suitable future repoting.
Benefit: More space to develop a trunk and root system.
Drawback: A vigorous tree in a large container may produce long, coarse roots; growth still needs management.
2. Plant over a flat board or tile
A flat board or tile under the root base can encourage roots to travel laterally rather than diving straight down. It is a long-term training aid, not a guarantee of perfect nebari.
- Use a healthy young tree at an appropriate repoting.
- Trim or position roots carefully so they radiate over the board.
- Keep the board stable and ensure the container drains freely.
- Check root health at later repottings; don’t assume every root is behaving as intended.
Bonsai Empire describes planting on a stone as one way to encourage sideways growth, while noting that regular repoting and selective root pruning are often enough. The difference is practical: a board can help constrain root direction, but it adds setup and monitoring.
3. Radially arrange roots during repoting
During a suitable repoting, fan the roots around the trunk like the spokes of a loose wheel. Keep them in contact with soil and avoid bending brittle roots sharply.
- Place roots into open sectors where possible.
- Keep large roots from crossing above the soil line.
- Secure the tree against movement.
- Preserve fine feeder roots and avoid excessive reduction.
This is often the most direct way to improve a young tree’s starting structure.
4. Prune and shorten vigorous roots selectively
Shorten roots that are excessively long, dominant, or poorly positioned, but maintain a functioning balance of roots. The objective is to encourage branching nearer the trunk—not to remove all the tree’s plumbing at once.
Perspective check: Some bonsai guides emphasize removing large downward roots, while cautious growers prioritize preserving enough healthy roots for recovery. Both are right in context. On a vigorous tree with many good roots, selective reduction can help. On a weak tree with few roots, preservation wins.
5. Encourage fine feeder roots near the trunk
Fine roots support water and nutrient uptake. They’re also easier to position and develop into a more refined root base over time. Use an appropriate, free-draining bonsai substrate and avoid letting roots dry during repoting. The RHS bonsai guide offers general cultivation advice, while species-specific guidance should govern soil and watering choices.
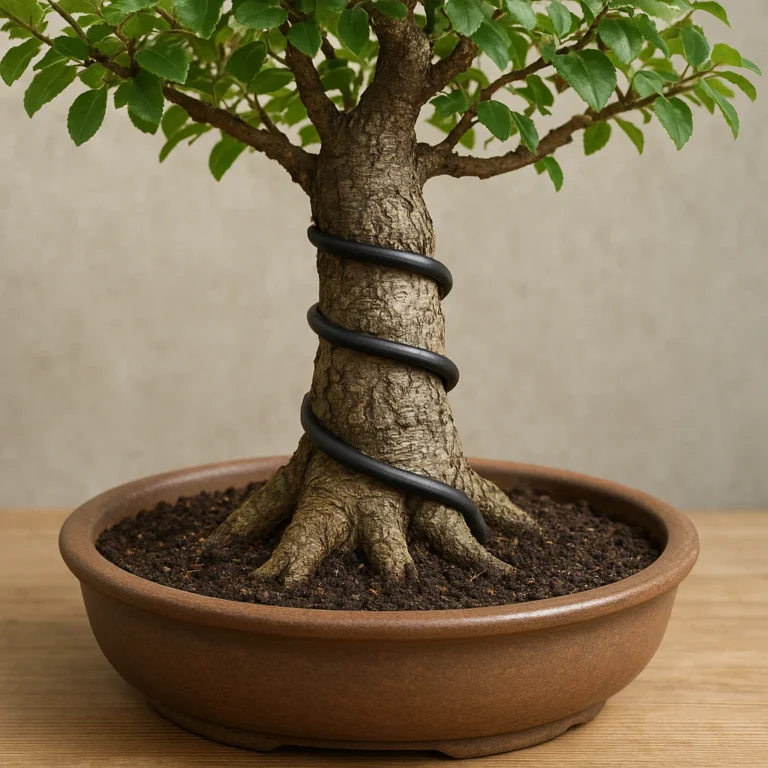
6. Use the tourniquet method with care
The tourniquet method uses a tight wire around the lower trunk to restrict the downward flow of sugars and encourage roots to form above the constriction. It’s an advanced technique, and the risk is real: a wire left too long can girdle and damage the trunk.
Bonsai Empire and Natureit both describe spring as the usual application period, but local climate, species, and growth stage matter. Don’t use this method on a tree you can’t monitor frequently. For most beginners, root arrangement at repoting is the safer starting point.
7. Create a root graft to fill a bare section
A root graft uses a suitable young plant or root to fill a missing area. This is specialist work: the graft must align and make a successful connection, and success depends on species compatibility and technique.
- Plan the graft location from the intended viewing angle.
- Use healthy, compatible material.
- Secure it firmly without crushing the tissues.
- Monitor growth and healing over time.
Growing Bonsai recommends grafting as one option for a trunk whose roots are concentrated one side. It can be effective, but patience and experience matter.
8. Air-layer above a poor or damaged root base
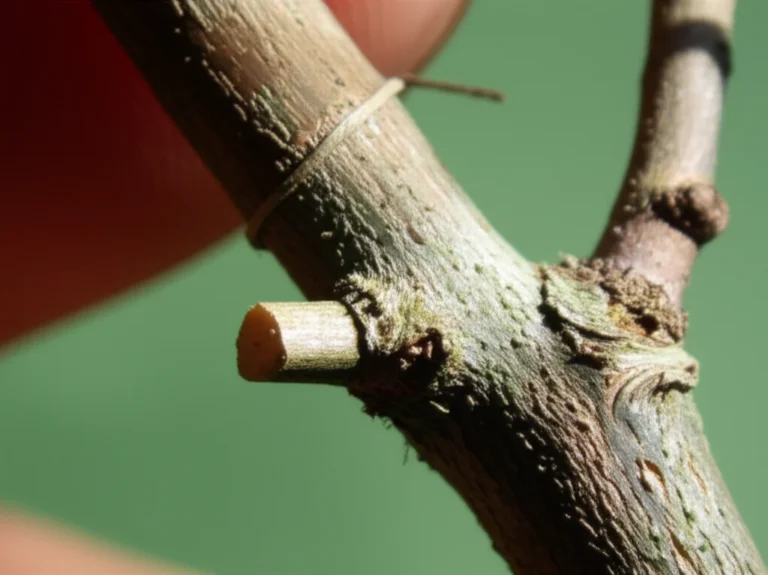
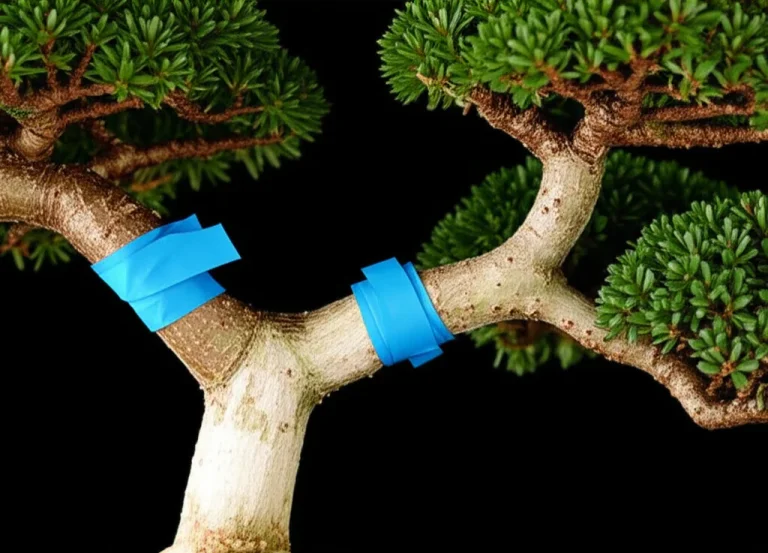
Air layering can create a new root system above a poor base, allowing you to remove or replace the unsatisfactory lower section once the new roots are established. It is not a quick cosmetic fix: the tree must grow a viable root system before separation.
Natureit discusses both tourniquet and ring methods. The ring method involves removing a band of bark and is more invasive; incorrect depth or aftercare can damage the tree. Learn the technique for your species and climate before attempting it.
9. Improve root visibility with gradual soil removal
Sometimes the roots are already present but buried too deeply. Remove soil gradually during appropriate repoting work rather than scraping down to the roots in one session.
- Expose only a small amount at a time.
- Check whether roots are healthy and firmly attached.
- Keep delicate roots shaded and moist.
- Re-cover roots that are not adapted to exposure.
- Allow the tree time to adjust before further exposure.
Not every tree benefits from dramatic root exposure. A naturally shallow-rooted species may tolerate it better than a tree whose roots have been sheltered deep in the soil.
How the featured video can help
The first YouTube video, “Creating better nebari on bonsai with young plants” by Growing Bonsai by Jelle, follows the development of young plant material and shows why root-flare work is often easiest when started early. It runs 9:20 and has been viewed nearly 30,000 times according to the supplied video details. Watch for the way development happens over time; don’t expect a single pruning session to produce a finished base.
✂️ Regular Root Pruning for a Wider, Healthier Nebari
Regular root pruning is a core technique for improving nebari, but it means careful selection at repoting, not aggressive cutting on a fixed schedule. Bonsai Empire recommends removing large downward-growing roots over time to encourage lateral growth.
Root-pruning steps at repoting
- Confirm timing and vigor. The species should be at a suitable stage, and the tree should be healthy.
- Prepare the pot and substrate. Don’t leave exposed roots waiting while you mix soil.
- Remove the tree and loosen the root mass. Work from the outside inward, using gentle movements.
- Locate the base. Clear enough soil to see the main roots and their directions.
- Choose priorities. Identify roots that cross, dominate, or dive downward.
- Cut selectively. Use clean, sharp tools and remove only what the tree can tolerate.
- Spread and secure roots. Arrange suitable roots radially and keep them in contact with soil.
- Repot and water thoroughly. Stabilize the trunk and follow species-appropriate aftercare.
How much root to remove—and when to stop
There is no safe universal percentage. Tree species, health, root condition, season, and prior work all matter. If you’re uncertain, remove less and reassess at the next suitable repoting.
Stop if:
- You’re removing a large share of the fine roots.
- The tree is weak or newly collected.
- The root system is sparse or damaged.
- The roots are drying out.
- You discover rot or other health problems.
Repoting depth, soil mix, and root placement
The nebari should be visible enough to read, but the root system should remain protected and well supported. Soil choice depends on species, climate, watering habits, and container. A granular, free-draining mix is common in bonsai culture, but no single recipe suits every situation. The Bonsai Empire soil guide explains the role of drainage and substrate components.
| Soil or setup | Potential advantage | Watch out for |
|---|---|---|
| Free-draining bonsai substrate | Supports aeration and predictable watering. | Particle size and watering frequency must suit the tree and climate. |
| Grow box or training pot | Encourages development and gives room to work. | Excessive space can produce coarse, long roots. |
| Shallow training container | Helps develop a flatter root plane. | Too shallow too early can restrict vigor and moisture buffering. |
| Board or tile | Can encourage lateral root direction. | Roots need monitoring and adequate moisture. |
🌱 Care After Root-Flare Work
Repoting and root pruning are stressful. Your task afterward is to support recovery, not to demand immediate growth. Keep the tree stable, follow species-specific care, and avoid stacking several major interventions together.
Watering, light, and shelter after repoting
Water thoroughly after repoting so the substrate is evenly moistened. Then adjust watering to the species, weather, and soil—not a calendar reminder. Protect a freshly worked tree from harsh wind and extremes, while still providing the light and conditions it needs. Avoid placing it in a dark corner for weeks unless species-specific advice calls for that.
The RHS bonsai care guide and Bonsai Empire care resources provide general guidance; local climate and species are decisive.
Fertilizing and recovery timing
Don’t rush fertilizer onto a tree that has just had significant root work. Wait until it shows healthy recovery and follow the product directions and species needs. A tree that isn’t growing well may need diagnosis, not extra fertilizer.
How to protect exposed roots from drying and damage
- Keep exposed roots shaded and moist while you work.
- Finish repoting promptly.
- Avoid rough handling and sharp bends.
- Don’t leave a newly exposed root base in hot sun or drying wind.
- Reconsider extensive exposure if the roots have previously been buried.
🌲 Species-Specific Root-Flare Advice
Species respond differently to pruning, exposure, and repoting. The guidance below is general; confirm timing and tolerance for your exact species.
Maple, elm, and other deciduous bonsai
Many deciduous species are amenable to root refinement, particularly when young and vigorous. Their branching root systems can create an attractive radial base, but large cuts still need to be justified by the tree’s health. Use bud development and local growing conditions to guide repoting timing.
Pine, juniper, and other conifers
Conifers can be less forgiving of root disturbance, depending on species and condition. Avoid assuming that a technique suitable for a vigorous deciduous tree is safe for a pine or juniper. If the tree is valuable or mature, consult an experienced conifer grower before major root work.
Ficus and tropical bonsai
Tropical species such as ficus are often worked during active growth in suitable warm conditions, but indoor care, light, and climate affect recovery. Protect newly exposed roots from drying and avoid cold stress. The Missouri Botanical Garden’s plant-care resources can help with species identification and basic horticultural information.
🚫 Common Nebari Mistakes and How to Fix Them
Most root-flare problems are easier to prevent than to reverse. The good news? A less-than-perfect base usually gives you several future opportunities to improve it.
One-sided roots and empty gaps
A root base concentrated one side can make the trunk look unstable. First, check whether smaller roots are present but buried. If a gap remains, gradually encourage roots into that sector through careful training, or consider a root graft if you have experience.
Crossing, tangled, or overly thick roots
Crossing roots can create a messy surface and interfere with a clean radial structure. At repoting, separate flexible young roots and shorten selected roots that dominate. Thick roots may need gradual reduction across multiple cycles rather than one major cut.
Reverse taper, buried flare, and exposed-root stress
If the trunk narows at the base and then swells above it, the visual transition may feel awkward. A root graft or air layer can sometimes help, but these are advanced options. If the flare is buried, uncover it gradually. If exposed roots begin to decline, protect or re-cover them; a visible root is not automatically a healthy root.
Over-pruning and working at the wrong time
The most serious mistake is combining heavy root pruning with poor timing or weak tree health. Don’t prune roots simply because a guide says “remove downward roots.” That advice assumes a tree with adequate vigor and a root system able to recover. When in doubt, preserve more, improve less, and get advice from a local bonsai club.
📅 Root-Flare Development Timeline and Progress Checks
Nebari development is measured in growing seasons, not weekends. A young, vigorous tree may show useful changes within a few seasons, while a mature tree with poor roots may need years of gradual correction.
What to expect after one season and over several years
| Stage | Typical focus | What to look for |
|---|---|---|
| First suitable repoting | Inspect and organize roots. | A clearer map of the root base. |
| Following growing season | Allow recovery and growth. | Healthy foliage and continued vigor. |
| Later repottings | Refine root direction and balance. | More even spread and fewer dominant crossings. |
| Long-term development | Improve taper and surface presentation. | Roots that gradually blend into the soil line. |
This is a planning framework, not a guarantee. Growth depends on species, climate, tree health, and how much work was done.
How to track root growth and adjust your plan
- Photograph the root base at each repoting.
- Mark the tree’s front and note the direction of major roots.
- Record what you removed and why.
- Compare the tree over time rather than judging it after one session.
- Change the plan if vigor declines or a root begins to dominate.
A root that was useful last year may become too strong later. Bonsai work is a conversation with a growing tree; occasionally, it answers, “Let’s not do that again.”